Posted on

.223 Remington vs. 5.56 NATO Ammunition: Key Differences and How to Choose the Right One

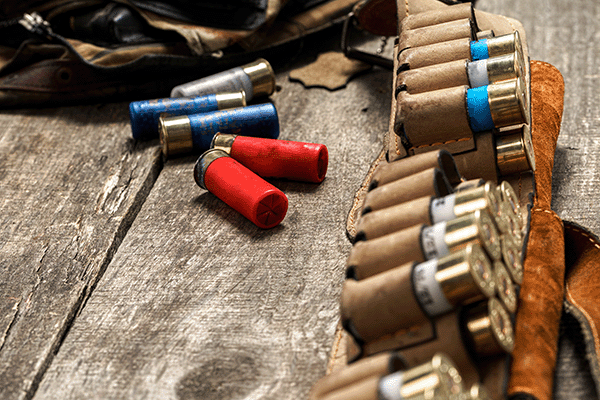
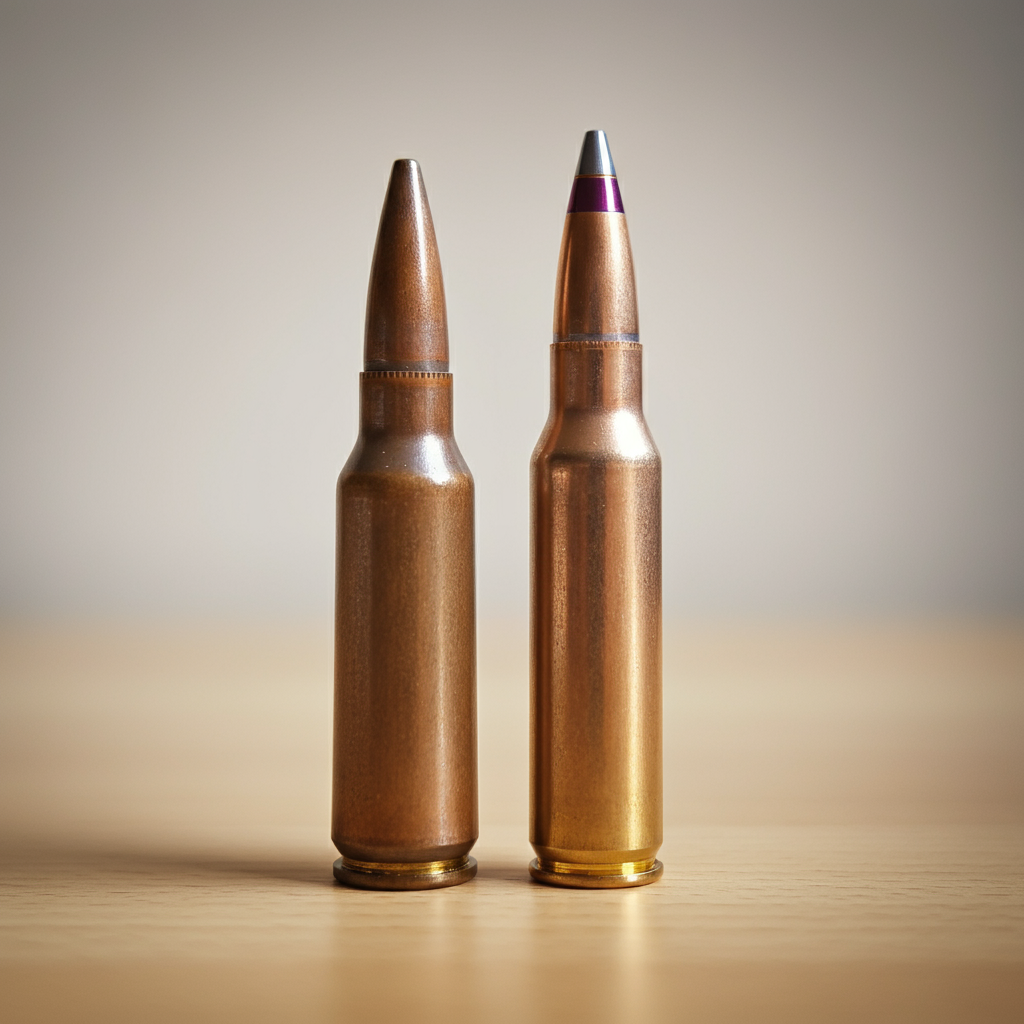
When it comes to ammunition for your rifle, the debate between .223 Remington and 5.56x45mm NATO is a hot topic. Though they may look nearly identical at first glance, these two rounds have important differences that can impact performance, safety, and usability depending on your firearm and shooting goals. If you’ve been wondering about the key differences between .223 and 5.56 ammo, we’ve got you covered. This comprehensive guide will walk you through their distinctions, highlight the pros and cons of each, and help you decide which is better suited to your needs.

What’s the Difference Between .223 Remington and 5.56 NATO?

Although .223 Remington and 5.56 NATO rounds share many physical similarities, they differ in five critical areas: chamber pressure, chamber dimensions, interchangeability, accuracy, and practical use.

1. Chamber Pressure

The primary difference between .223 and 5.56 lies in their operating pressures.

  • 5.56 NATO ammunition is manufactured to withstand higher chamber pressures. This results in greater velocity and energy when fired, which can make it more effective in certain situations.
  • .223 Remington, on the other hand, is designed to operate at lower pressures. While not as intense as 5.56, its reduced pressure often translates to less wear and tear on your firearm.

Higher pressure translates into more power, but it also requires a firearm that can safely handle it. This brings us to the next major distinction.

2. Chamber Dimensions

The firearms designed for .223 and 5.56 differ slightly when it comes to chamber dimensions, particularly the throat, or “leade,” of the chamber.

  • 5.56 NATO chambers feature a longer throat (an area between the chamber and barrel rifling). This extra length is designed to accommodate the higher pressures of 5.56 ammo, dispersing pressure safely without causing damage.
  • .223 Remington chambers have a shorter throat and are more tightly dimensioned. This tighter fit boosts accuracy but can result in dangerously high pressures when firing 5.56 ammo, which is not recommended.

Because of these dimensional differences, it’s important to match your ammo to the chambering of your firearm. Firing the wrong type can reduce performance at best and be unsafe at worst.

3. Interchangeability

Can you use 5.56 ammo in a gun chambered for .223, or vice versa? Here’s the answer:

  • 5.56 in a .223 chamber is unsafe. The tighter chamber and shorter throat of the .223 barrel can cause dangerous pressure spikes when firing higher-pressure 5.56 rounds. This can lead to malfunctions or, in extreme cases, damage to the firearm.
  • .223 in a 5.56 chamber, however, is safe and common. Many firearm owners routinely fire .223 rounds from their 5.56 NATO rifles without issue. The only downside could be a slight dip in accuracy due to the looser chamber fit.

To avoid confusion, check the markings on your barrel or receiver. It will clearly state whether your gun is chambered for .223 Remington, 5.56 NATO, or both.

4. Accuracy

Accuracy is a prime consideration for many firearm enthusiasts, particularly hunters and sport shooters. Here’s how .223 and 5.56 stack up:

  • .223 Remington has a reputation for being slightly more accurate. Its lower chamber pressure combined with tighter chamber dimensions make it well-suited for precision shooting. This is why many hunters and target shooters gravitate toward .223.
  • 5.56 NATO, while still accurate, may not deliver the same level of precision as .223. That said, it’s more than adequate for applications where pinpoint accuracy is not the top priority.

Ultimately, accuracy differences may also depend on the specific firearm, ammunition brand, and even shooter skill.

5. Applications and Uses

While both .223 and 5.56 can perform many tasks well, each has its favored niches based on its characteristics.

  • 5.56 NATO is commonly used in military and tactical settings. Its higher velocity and energy make it effective for combat situations where stopping power and reliability are paramount. Many civilian shooters also favor 5.56 for home defense or range training.
  • .223 Remington shines in civilian applications like hunting, target shooting, and varmint control. Its precision and slightly milder recoil make it ideal for these scenarios.

If you’re an enthusiast who does a bit of everything, 5.56 NATO offers versatility. However, if you’re primarily looking for a hunting or competitive round, .223 might be your go-to.

6. Cost and Availability

When choosing between calibers, cost and availability often play a role. Thanks to its widespread military use:

  • 5.56 NATO ammo is generally more abundant and often slightly cheaper. Its production is bolstered by high demand among law enforcement and military suppliers, making it a popular and cost-effective choice for civilian shooters.
  • .223 Remington ammo may be slightly more expensive, depending on the brand and load type. That said, differences in price are often minor, and both calibers are widely available.

If you’re on a tight budget, keeping an eye on bulk deals or military surplus can make 5.56 NATO even more economical.

Which Should You Choose?

The answer depends on your specific needs and the firearm you own. Here’s a quick breakdown:

  • Choose .223 Remington if you prioritize:
    • Precision for target shooting or hunting
    • Using a rifle chambered specifically for .223
    • Slightly reduced recoil and wear on your firearm
  • Choose 5.56 NATO if you prefer:
    • Higher power and velocity for tactical or defensive purposes
    • Versatility with both 5.56 and .223 ammunition in a 5.56 rifle
    • Cost-effectiveness, particularly for high-volume shooting

If you’re still unsure, you might consider a rifle chambered for “.223 Wylde.” This hybrid chamber allows safe use of both .223 and 5.56 ammunition while preserving accuracy and handling pressure differences.

Final Thoughts

Both .223 Remington and 5.56 NATO are excellent calibers with overlapping strengths. By understanding their differences in chamber pressure, dimensions, interchangeability, and applications, you can make an informed decision based on your shooting goals and firearm setup.

Before loading up, always double-check your firearm’s markings to ensure compatibility. Safety, accuracy, and performance matter most, so the right ammo depends on matching your gear to your needs. Whether you’re hitting the range, hunting in the field, or engaging in practical training, choosing the proper ammunition will make all the difference.

Posted on

A Complete Guide to Ammunition: Types, Uses, and Safety Tips

Whether you’re a seasoned firearm enthusiast or new to the world of shooting sports, understanding ammunition is essential. Selecting the right ammunition not only influences your shooting experience but also ensures safety and effectiveness. Here’s our A Complete Guide to Ammunition: Types, Uses, and Safety Tips.

This blog will cover the basic types of ammunition, their specific uses, how to choose one that suits your needs, as well as tips for safe storage and legal considerations. By the end, you’ll have a comprehensive understanding of what’s best for your individual purpose.

What is Ammunition?
Ammunition, often referred to as “ammo,” consists of the projectiles, powders, primers, and casings needed to propel a bullet or other projectile from a firearm. Although people often think only of bullets, ammunition is a broader term including a variety of round types, each designed for a specific purpose.

Components of Ammunition
Each cartridge generally consists of four main components:

Case – The shell that holds all other components; typically made of brass, steel, or aluminum.
Primer – The ignition source that lights the gunpowder when struck.
Gunpowder – A chemical fuel that creates pressure to propel the projectile.
Projectile/Bullet – The part that is fired toward a target.
Now that we understand the basics of ammunition, let’s explore the different types.

Types of Ammunition and Their Uses
Ammunition can vary widely based on its design and intended use. Here are the most common types and what they’re used for:

1. Handgun Ammunition
Handgun ammunition is designed for pistols and revolvers, and it’s most commonly used for self-defense, sport shooting, and law enforcement. Popular types include:

9mm Luger – Known for its balance of power and low recoil, ideal for personal defense and target practice.
.45 ACP – A heavier round offering significant stopping power.
.38 Special – A versatile option, often used in revolvers.
2. Rifle Ammunition
Primarily used for hunting, long-range target shooting, and military purposes, rifle ammo comes in various calibers, including:

.223 Remington/5.56 NATO – Popular for small game hunting and sport shooting.
.308 Winchester – A powerful round used for big game hunting and tactical applications.
.30-06 Springfield – Ideal for larger game like elk or moose.
3. Shotgun Ammunition
Shotguns fire shells instead of cartridges, and these shells may contain pellets (shot), a single slug, or specialty payloads. Common shotgun uses include hunting, home defense, and clay shooting:

Birdshot – Small pellets used for bird hunting.
Buckshot – Larger pellets designed for home defense or larger game.
Slugs – A single, solid projectile ideal for precise shooting.
4. Specialty Ammunition
For specific needs, specialty ammunition offers unique features:

Hollow-Point Bullets – Designed to expand upon impact, making them highly effective for self-defense.
Armor-Piercing Rounds – Used in tactical or military scenarios (restricted for civilian use in many jurisdictions).
Tracer Rounds – Leave a bright trail, commonly used for training or signaling.
Choosing the Right Ammunition
Selecting ammunition depends on factors like firearm type, intended purpose, and personal preference. Here’s a breakdown of some considerations:

1. Purpose
Understanding your goals can help narrow your options:

Self-Defense – Hollow-point or frangible bullets ensure stopping power without over-penetration.
Hunting – Choose based on the game; for instance, rifle rounds like .30-06 for deer or birdshot for waterfowl.
Target Shooting – Affordable, non-specialized ammunition such as full metal jacket (FMJ) rounds is ideal for practice.
2. Caliber
Always match the ammunition caliber to your firearm. Using the wrong caliber can cause malfunctions or even damage your weapon.

3. Quality
Invest in reputable brands to ensure consistent performance and safety. Low-quality or poorly manufactured ammunition can misfire or compromise accuracy.

Safe Storage and Handling
Properly storing ammunition protects it from environmental damage and prevents accidents. Follow these tips:

1. Storage Guidelines
Cool and Dry Environment – Excess heat or moisture can damage both the primer and gunpowder, reducing reliability.
Secured Storage – Use a locked ammo box or cabinet to keep it out of reach of children and unauthorized individuals.
Organized Labeling – Clearly label each type or caliber for easy identification.
2. Good Practices
Rotate stock periodically to ensure you’re not relying on older, possibly degraded ammunition.
Never mix different calibers in the same storage container to avoid loading the wrong ammo accidentally.
Legal Considerations
Laws surrounding ammunition ownership and use vary greatly by location, so it’s important to stay informed:

Background Checks – Some states or countries require background checks for ammunition purchases.
Online Purchases – Restrictions may apply, such as the need for shipment to licensed dealers or age verification.
Specialty Rounds – Certain types, like tracers or armor-piercing rounds, may be restricted or prohibited.
Always check local, state, and federal laws to ensure you stay compliant.

Final Thoughts
Ammunition is an integral part of firearm use, and understanding its different types, purposes, and guidelines can enhance your experience while ensuring safety. Whether you’re using it for self-defense, hunting, or sport, choosing the right ammo matters.

Remember to store ammunition responsibly, and always stay up to date on legal regulations. By doing so, you’ll not only be a responsible gun owner but also enjoy a more rewarding shooting experience.

If you’re looking to explore specific types of ammunition or need tips on buying the right ammo for your needs, feel free to leave a comment or get in touch!

Your blog post on ammunition is ready! Let me know if you’d like any adjustments or need help with something else.

Posted on

The Power of Situational Awareness: How to Stay Safe and Alert

Situational awareness

Imagine you’re enjoying a walk through a bustling park or navigating your commute in a busy city. Suddenly, an unexpected event—a loud shouting, a break in traffic flow—snaps you out of your reverie. It’s in this moment that situational awareness becomes your greatest tool.

Situational awareness is more than just being alert; it’s a proactive mindset that allows you to anticipate and respond to potential risks in your surroundings. Whether you’re a security professional safeguarding against threats or an everyday individual navigating routine activities, mastering situational awareness significantly enhances your safety and confidence.

This blog will explore the concept of situational awareness, why it’s crucial in today’s world, and practical steps you can follow to develop and maintain it.

What Is Situational Awareness?

Situational awareness is the ability to perceive your surroundings, understand what they mean, and anticipate how they might change. Essentially, it’s staying present and informed about the environment you’re in.

This concept may sound straightforward, but honing situational awareness takes conscious effort. It’s about going beyond passive observation to actively processing information and predicting outcomes.

Situational awareness draws from three core stages:

  1. Perception – Observing your environment, spotting key details, and identifying unusual behavior or risks.
  2. Comprehension – Understanding the context of what you’ve observed and its implications.
  3. Prediction – Anticipating what’s likely to happen next and deciding on the best response.

Safety enthusiasts, security professionals, and even aviation experts rely on situational awareness to make informed decisions—whatever their setting.

Why Is Situational Awareness Important?

From preventing accidents to avoiding potentially dangerous encounters, situational awareness is a crucial skill in all walks of life. Here’s why it matters for different individuals and industries.

Everyday Situations

For everyday individuals, situational awareness could mean avoiding a collision at a busy intersection, recognizing a pickpocket in a crowd, or remembering landmarks during a hike to avoid getting lost. The ability to stay alert and anticipate risks can transform mundane tasks into safer experiences.

Workplace Security

Security professionals rely heavily on situational awareness to identify and neutralize unexpected risks. Whether it’s monitoring for suspicious behavior in a crowded venue or ensuring perimeter safety in a corporate setting, being hyper-aware often prevents crises before they escalate.

Extreme Scenarios

Situational awareness becomes life-saving in high-pressure environments. Military personnel, firefighters, and first responders are trained to process multiple inputs rapidly, sometimes making split-second decisions under chaotic circumstances. Their heightened sense of awareness can mean the difference between life and death.

No matter where you fall on this spectrum, situational awareness is a tool you can develop for your personal safety and well-being.

How to Cultivate Situational Awareness

Want to improve your situational awareness? Follow these straightforward yet effective steps to build this critical skill.

1. Stay Focused and Eliminate Distractions

Start with the basics—put down the phone and look up. Many people become so absorbed in their devices that they lose track of their surroundings, making them vulnerable to accidents or threats.

By minimizing distractions, especially in high-risk areas like busy streets or crowded spaces, you can devote your attention to the present environment.

2. Practice the “Observe, Orient, Decide, Act” (OODA) Loop

Originally developed for military strategy, the OODA loop is a practical framework you can use every day to sharpen awareness.

  • Observe your surroundings. Look for anything unusual or out of place.
  • Orient yourself using landmarks, exit points, or familiar references.
  • Decide based on your observations—a route to take, an object to avoid, or an action to prepare for.
  • Act swiftly and decisively if necessary.

3. Trust Your Instincts

Your “gut feeling” often picks up on subtle cues your conscious brain may miss. If something feels off—a parked car idling too long, a person following too closely—pay attention to that instinct. It could alert you to danger before it becomes obvious.

4. Observe Hands and Behavior

Body language often speaks louder than words. When evaluating a person, focus on their behavior and hands. Are their movements overly jittery? Are they concealing something? These are subtle but significant cues that can heighten your awareness.

5. Use Peripheral Vision

Your central vision typically focuses on specific details; don’t forget to utilize your peripheral vision for a broader field of view. This habit helps you notice unexpected motion or events outside your immediate focus.

For example, when walking down a street, scan from side to side occasionally while maintaining forward awareness.

6. Develop Mental Mapping Skills

Create a mental map of your environment. Look for exits when you enter a building, note nearby landmarks on outdoor paths, and have a general sense of nearby safe zones. Should an emergency arise, having an internalized map saves precious time.

7. Practice Situational Exercises

You can train situational awareness through simple exercises like memory games or observation drills. Challenge yourself to recall details of a location after leaving or spot subtle differences between photographed scenes. Over time, these exercises improve your attentiveness and detail retention.

Situational Awareness in the Digital World

Situational awareness doesn’t just apply in physical spaces—it’s equally critical in the digital realm. Cybersecurity breaches often stem from a lack of awareness online, such as clicking on phishing links or failing to secure important accounts.

Here are tips for staying situationally aware online:

  • Regularly monitor the permissions and activity on your devices.
  • Avoid accessing personal accounts over unsecured public Wi-Fi.
  • Think twice before sharing sensitive information on social platforms.

By applying these strategies, situational awareness becomes your first line of defense in both physical and digital spaces.

Situational Awareness as a Lifelong Habit

The great thing about situational awareness? It’s a skill you can build and enhance over time. By practicing alertness in everyday scenarios, whether as simple as noticing where you parked your car or as complex as navigating high-risk environments, this habit becomes second nature.

Remember, awareness is empowering. It fosters confidence and lowers your exposure to risks, keeping you one step ahead of your surroundings.

Your safety begins with awareness—and that begins with you.

Products:

12 Gauge Dragon’s Breath Shot Gun Ammunition

Videos:

Our YouTube Channel

Posted on

Cold Weather Camping Primer: Tips for Staying Warm and Prepared

Winter Camping

Camping during colder months can be an awe-inspiring experience. Imagine waking up to frost-kissed landscapes, tranquil mornings, and crisp air that’s a refreshing change from daily life. But with plunging temperatures, cold weather camping can also be a challenge for those unprepared.

Whether you’re looking to relish autumn’s final leaves or explore snowy terrains, this guide offers outdoor lovers and camping beginners the essential knowledge to stay warm, comfortable, and safe when camping in cold weather. From packing the right gear to understanding survival basics, here’s everything you need to know to get started.

Why Cold Weather Camping?

Cool weather camping offers a unique charm that summer excursions often lack. Trails are quieter, bugs are scarce, and there’s something magical about bundling up under a star-lit winter sky. Still, it’s important to acknowledge the challenges—hypothermia and frostbite are real risks if you’re not equipped for dipping temperatures. By preparing properly, however, you can fully enjoy these serene outdoor adventures.

Key Benefits of Cold Weather Camping

  • Crowd-free Experiences: Many parks, forests, and camping sites are less crowded during colder months, giving you more space to immerse yourself in nature.
  • Improved Sleep Quality: Did you know cooler temperatures can improve sleep? With a warm sleeping bag and proper campsite setup, you’ll find snoozing under the stars revitalizing.
  • Unique Beauty: Snow-covered trails, icy lakes, and winter wildlife create breathtaking views—perfect for adventurers and photographers.

The Essentials of Cold Weather Camping

1. Invest in the Right Gear

Your gear will make or break your cold weather trip, so it’s worth prioritizing quality.

Sleeping Gear

  • Four-Season Tent: Designed to withstand snow and harsh winds, a four-season tent provides crucial insulation.
  • Sleeping Bag: Look for one rated at least 10°F colder than the temperatures you expect. Down sleeping bags are lightweight and highly effective but may lose insulation when wet, so consider synthetic alternatives if moisture is a risk.
  • Sleeping Pad: Combine an insulated or foam pad with your sleeping bag to prevent heat loss to the ground.

Clothing

Layering is key to staying warm. Stick to these categories of clothing:

  1. Base Layer: Moisture-wicking thermal underwear made of wool or synthetic fibers. Avoid cotton, as it traps moisture.
  2. Middle Layer: Fleece or down sweaters that provide insulation.
  3. Outer Layer: Waterproof and windproof jackets to shield against harsh elements.

Don’t forget insulated gloves, wool socks, a warm hat, and a scarf or balaclava to protect your nose and face.

2. Learn Smart Packing Techniques

Cold weather requires more gear, so pack strategically to manage weight and minimize bulk:

  • Use packing cubes or compression sacks to keep your items organized and compact.
  • Keep emergency items like a first-aid kit and fire-starting tools easily accessible at the top of your bag.
  • Place batteries, snacks, and anything that could freeze inside your jacket during the day or sleeping bag at night.

3. Master Campfire Safety

A roaring campfire is the heart of any campsite, especially in cold weather. It’s crucial for staying warm and cooking, but safety shouldn’t be overlooked:

  • Use Dry Wood & Fire Starters: Collect dry firewood or bring natural fire starters if rain or snow is a possibility.
  • Build Efficient Fire Pits: Shield your fire from wind with rocks or other natural barriers.
  • Always Extinguish Safely: Fully douse your fire to avoid accidental forest fires.

Pro Tip 🚨 : If fire-starting feels daunting in wintry conditions, consider bringing a portable propane stove as an alternative.

4. Stay Hydrated and Fueled

Cold weather camping burns more energy, so your body needs extra fuel and hydration to maintain warmth. Plan meals that are high in calories, carbs, and fats.

  • Bring Warm Drinks: Hot chocolate, soup, and herbal tea are perfect for warming up after a chilly day outdoors.
  • Prevent Freezing: Insulated bottles or keeping your water container inside your backpack helps prevent liquid from freezing.

Setting Up the Perfect Cold Weather Campsite

1. Choose the Right Location

Scout the area for natural windbreaks like boulders or groups of trees. Avoid low-lying areas prone to frost or cold air pooling overnight.

2. Keep Elevation in Mind

Be cautious of high-altitude camping, as temperatures drop quicker at higher elevations, especially during the night.

3. Ventilation is Key

While it may seem counterintuitive, cracking a tent window or vent prevents condensation buildup, which can dampen your gear and chill your space.

4. Insulate Your Campsite

Raise yourself off the cold ground using a foam pad, tarp, or other gear to trap heat. Some campers even place pine branches beneath their tent for added warmth.

Safety Tips for Cold Weather Camping

  • Know the Signs of Hypothermia: Early symptoms include shivering, confusion, slurred speech, and fatigue. Staying dry and hydrated is the best prevention strategy.
  • Bring a Backup Heat Source: Whether it’s hand warmers, a small propane heater, or heated gloves, always have extra heat sources on hand.
  • Inform Someone About Your Trip: Leave your intended camping location and return time with a trusted friend in case of emergencies.

Why Cold Weather Camping is Worth the Effort

Getting out of your comfort zone and into the frosty air is a challenge worth taking. With fewer distractions, breathtaking natural beauty, and the quiet hum of snow-covered landscapes, winter camping brings you closer to nature like no other outdoor adventure. And with the right preparation, it doesn’t have to mean sleepless nights or frozen feet.

Warm layers, expert gear choices, and safety precautions are your ticket to unlocking the serenity of cold wilderness. Adventure beckons—are you ready to answer its call?

Products:

12 Gauge Dragon’s Breath Shot Gun Ammunition

Videos:

Our YouTube Channel

Posted on

The Ins and Outs of Turkey Hunt Ammunition

Turkey Hunt Ammo

A successful turkey hunt requires preparation, patience, and, most importantly, the right ammunition. While every hunter dreams of the perfect shot, achieving it starts with understanding the details of your ammo—what makes certain rounds more effective, how to choose the right shell size, and what considerations come into play when targeting these wily birds.

Whether you’re new to turkey hunting or a seasoned hunter looking to refine your approach, this guide will arm you with everything you need to know about turkey hunting ammunition. We’ll explore shell types, materials, shot sizes, and some tips for improving your hunting game.

Why Choosing the Right Ammunition Matters

Turkeys are challenging prey. Their sharp eyesight, quick reflexes, and dense feathering make them notoriously tricky to hunt. The right ammunition can mean the difference between a clean shot or spooking the bird. It affects your range, pattern density, and power—all essential for a humane, accurate hunt.

When you’re choosing ammunition, you’re not just looking for effective stopping power. It’s also about ensuring a controlled spread that targets the head and neck. After all, clean and ethical kills are the hallmark of responsible hunters.

Beyond ethical considerations, your ammunition also plays a role in ensuring you comply with hunting regulations which vary by location. Certain states or regions may enforce restrictions on the type of materials used in ammo—like prohibiting lead in certain areas—so knowing your options is crucial.

Types of Turkey Hunting Ammunition

When it comes to turkey hunting ammo, choosing between material types, gauges, and shell lengths is essential. Let’s break them down step-by-step:

1. Gauge

One of the first considerations is your shotgun’s gauge. The “gauge” defines the bore size of a shotgun and its corresponding shell’s dimensions. For turkey hunters, the most common gauges are:

  • 12-Gauge: Known for its versatility and power, it’s the most widely used gauge for turkey hunting. It delivers an excellent balance of payload and range and works especially well with larger pellet sizes for increased stopping power.
  • 20-Gauge: A lighter alternative, the 20-gauge is growing in popularity among hunters seeking reduced recoil. While the 20-gauge has less range and payload compared to the 12-gauge, modern ammunition advancements make it highly effective for turkey hunting.
  • 10-Gauge (Less Common): More powerful with a significantly heavier payload, the 10-gauge has fallen out of favor due to its weight and recoil. However, for long-range hunting, it still finds its advocates.

Your choice of gauge depends on personal preference, comfort level, and the shotgun you own. Always make sure your ammunition matches your shotgun’s specifications.

2. Shot Materials

The material of the pellets—or “shot”—plays a critical role in performance and compliance with hunting regulations. The most common materials for turkey hunting are:

  • Lead: Traditional and effective, lead provides excellent density and downrange performance. It’s affordable and accessible, making it a favorite among many hunters. However, in areas with strict environmental regulations, lead may be prohibited.
  • Hevi-Shot & Tungsten (High-Density Alloys): Advanced non-toxic alternatives offering greater density than lead. These materials allow for smaller shot sizes that still pack a powerful punch. While pricier, these shells deliver remarkable range and pattern density, making them worth the investment for serious hunters.
  • Steel: A cheaper non-toxic option. While steel is often required in waterfowl hunting, it’s less favored for turkey hunting due to its lighter weight and reduced energy retention.

3. Shell Length

Shell lengths determine the amount of shot and powder the shell holds. Common turkey hunting lengths include 2¾ inches, 3 inches, and 3½ inches. Longer shells typically house more pellets, resulting in denser patterns at greater ranges:

  • 3-Inch Shells: The gold standard for turkey hunting, offering a solid balance of shot density and manageable recoil.
  • 3½-Inch Shells: Best for hunters seeking maximum range and power, though they come with a tradeoff of significant recoil.

4. Shot Sizes

Shot size refers to the diameter of each individual pellet within the shell. Smaller numbers indicate larger pellets. For turkey hunting, shot sizes range from #4 (larger and heavier) to #9 (smaller).

  • #4 and #5: Ideal for their size and power, these are effective for longer ranges but may deliver fewer pellets in a pattern.
  • #6 (Most Common): Balanced between range and pellet count, making it a versatile choice for most scenarios.
  • #7 and #9 Tungsten (High-Density Only): These smaller particles are optimized for density and consistently deliver superior patterning, especially with premium ammunition.

5. Specialized Turkey Loads

Dedicated turkey hunters often turn to shells developed specifically for the sport. These specialized loads combine the ideal gauge, material, payload, and shot size for optimum performance. Premium brands like Winchester Long Beard XR, Federal Heavyweight TSS, and Remington Nitro Turkey are just a few industry leaders worth exploring.

Tips for Ammunition Selection and Use

Getting the right ammo isn’t enough—you also need to make sure it performs well in your specific shotgun. Here are some tips to optimize your hunting setup:

1. Pattern Your Ammo

Pattern your shotgun with different ammo brands and sizes. By shooting at a target from typical turkey hunting distances (e.g., 30-40 yards), you can see how the pellets spread and check if your shots consistently hit the intended area.

2. Consider a Turkey Choke

Using a specialized turkey choke constricts the spread of your pellets, enabling tighter patterns at longer ranges. This is especially effective when paired with high-performance ammunition.

3. Know Your Range

While premium ammo might boost your effective range, shooting turkeys at excessive distances increases the risk of wounding them rather than achieving clean kills. Aim for ethical distances within the capabilities of your chosen ammo.

4. Stay Updated on Regulations

Hunting regulations can vary widely. Some areas enforce bans on lead ammo, while others have limits on shot sizes or shell lengths. Be sure to check local laws before heading into the field.

Beyond the Basics: Caring for Your Ammo

Proper storage and handling of your turkey hunting ammunition can make or break your experience. Store shells in a cool, dry place to prevent corrosion and moisture damage. Always inspect ammunition for defects before heading out to ensure reliable performance.

Turkey Hunting Ammunition FAQs

How many shells should I carry while turkey hunting?

Carrying three to five shells is usually adequate for a day of turkey hunting. This allows room for additional shots in case of misfires or multiple opportunities.

Should I use magnum loads for turkey hunting?

Magnum loads aren’t always necessary but can provide an advantage with extra range and pattern density. However, they also come with increased recoil.

Can I use waterfowl ammunition for turkey hunting?

Technically, yes. But waterfowl ammo, often designed with steel shot, may lack the density and pattern optimization needed for turkeys.

Gear Up and Take Aim

Choosing the right turkey hunting ammunition is about balance—finding the perfect combination for your shotgun, hunting style, and budget. By understanding the nuances of gauges, materials, and shot sizes, you equip yourself for a successful, ethical, and rewarding hunt.

Armed with these insights, you’re ready to hit the field and experience the thrill of chasing gobblers. Don’t forget, the best ammo is the one that gives you confidence as you line up that perfect shot. Happy hunting!

Products:

12 Gauge Dragon’s Breath Shot Gun Ammunition

Videos:

Our YouTube Channel

Posted on

The Best Turkey Shot: Mastering the Art of an Ethical Hunt

Turkey hunting is an exhilarating and challenging experience that tests a hunter’s skill, patience, and precision. Whether you’re a seasoned professional or a beginner looking to bag your first turkey, one question always stands out in the field—what is the best turkey shot?

Knowing where and how to shoot a turkey ensures not only a successful hunt but also an ethical one that respects the animal. This blog will walk you through the anatomy of the perfect turkey shot, consider different scenarios, and give you strategies to make every hunt a satisfying one.

Understanding Turkey Anatomy for the Perfect Shot

Before you can hit the mark, you first need to understand your target’s anatomy. Turkeys are built differently from larger game animals like deer, so precision is non-negotiable. A poorly placed shot can lead to an injured bird that escapes rather than a clean harvest.

Turkey Vital Areas

The two most effective zones for a turkey shot are the vitals and the head/neck area:

  1. The Head and Neck

A shot to the head or neck is almost always a successful kill. The brain and spinal column in these areas make for an instant, ethical harvest if hit accurately. This is the preferred shot for hunters using shotguns because it provides a broad target with minimal meat waste.

  1. The Vital Organs (Heart and Lungs)

The heart and lungs are located just below and behind the wing’s base. This shot requires excellent precision and is ideal for bowhunters using broadhead arrows. A well-placed shot here ensures a quick and humane harvest.

Understanding the anatomy of these critical areas will give you the confidence to take the right shot, no matter the situation.

Choosing the Best Gear for a Clean Turkey Shot

The right equipment plays a key role in making an ethical shot. Whether you’re using a shotgun, a bow, or even hunting with air rifles, the gear you choose impacts your aim, range, and effectiveness.

Shotguns

The shotgun is by far the most popular choice for turkey hunting. Here’s what you need to know:

  • Gauge: A 12-gauge or 20-gauge shotgun is the most common choice for turkey hunters. The 20-gauge offers lighter recoil, while the 12-gauge packs more punch.
  • Choke Tubes: Opt for a turkey choke or an extra-full choke, designed to create a tight shot pattern that’s lethal for turkeys, even at longer ranges.
  • Ammo: Use specialized turkey loads, typically No. 4, 5, or 6 shot. These sizes offer the right balance of pellet count and stopping power.

Bows and Crossbows

Hunting turkeys with a bow adds a whole new level of challenge to your hunt. Here’s what you should consider:

  • Draw Weight: A lighter draw weight between 40–55 pounds is ideal; turkeys don’t require the same force as larger game.
  • Broadhead Tips: Use specialized mechanical or guillotine-style broadheads to ensure ethical kills with well-placed shots to the neck or vitals.
  • Accuracy: A bow requires precision, so practice regularly on turkey targets to improve your aim.

Air Rifles

Though not as common, some hunters use air rifles to hunt turkeys where legal. Precision is key here, so clean shots to the vitals or the base of the neck are required.

When to Take the Shot

Timing is just as crucial as accuracy when hunting turkeys. Recognizing the right moment ensures a clean, ethical shot with minimal stress to the bird.

Wait for the Perfect Position

Turkeys are skittish by nature, so it’s essential to shoot only when they are stationary or moving slowly. Ideally, you’ll want the bird to be standing broadside (perpendicular to you) or facing directly away. This provides a clear view of the vital areas or the base of the head and neck.

Mind the Distance

Knowing your effective range is critical. Most turkey hunters limit their shotgun range to 30-40 yards. Bowhunters should aim for 20-30 yards depending on their skills and equipment. Using a rangefinder can help you avoid misjudging distances.

Check for Obstructions

Turkeys are often hidden behind brush or other obstacles. Always ensure you have a clear shot and that your pellets or arrow won’t be deflected.

Advanced Tips for the Best Shot

Use Decoys to Control the Scenario

Decoys are invaluable tools for turkey hunters. By placing a hen decoy in a clear shooting lane, you’ll increase your chances of luring in a curious or aggressive gobbler. When the tom moves into position, you’ll have the time and clarity for a well-placed shot.

Learn the Art of Calling

Turkey calls—whether friction, box, or diaphragm—are excellent tools for bringing birds closer. Practice well ahead of the season to sound as authentic as possible. The closer the turkey gets, the higher your chances of making the perfect shot.

Practice Makes Perfect

The field isn’t the place to test your skills for the first time. Invest in realistic turkey targets (available for both shotguns and bows) and practice regularly. Aim for the head and neck with a shotgun, or the vital areas with a bow.

The Most Important Rule in Turkey Hunting

Above all, every ethical hunter must follow this cardinal rule—never take a questionable shot.

If the turkey is too far away, partially hidden, or moving erratically, don’t risk a bad shot. A true hunter respects the game and prioritizes a clean harvest over any personal ambition.

Why Ethical Hunting Matters

Ethical hunting ensures that wildlife is treated with respect and enables future generations to enjoy the pursuit as well. By educating yourself, practicing your skills, and making deliberate, well-thought-out decisions in the field, you contribute to the sustainability of this rewarding tradition.

Final Word on Perfecting Your Turkey Shot

From understanding turkey anatomy to gearing up and perfecting your aim, every step in the process matters when it comes to landing the best turkey shot. Patience, preparation, and practice will always yield the best results—and make your time in the great outdoors even more rewarding.

Now that you’re armed with this guide, it’s time to take your skills to the next level. Head into the field with confidence, knowing that your next turkey hunt will be an ethical and successful one. Happy hunting!

Products:

12 Gauge Dragon’s Breath Shot Gun Ammunition

Videos:

Our YouTube Channel

Posted on

How to Prepare for a Natural Disaster

Natural disaster

Prepare for a Natural Disaster – Natural disasters often strike with little to no warning, and while we can’t control them, we can control how we prepare. Whether it’s a hurricane, earthquake, wildfire, or flood, knowing what to expect and how to respond can make a life-saving difference.

This blog will walk you through essential steps to prepare for a natural disaster, offering practical advice for homeowners, families, and emergency preppers. From creating a disaster supply kit to putting together a family emergency plan, we’ve got you covered.

Why Preparing for a Natural Disaster Is Critical

Even with the best weather forecasting and emergency warnings, natural disasters can lead to chaos. The Federal Emergency Management Agency (FEMA) reports that nearly 60% of Americans say they’re not prepared for a disaster. This lack of preparation can result in property damage, financial losses, and, in extreme cases, loss of life.

Preparing ahead of time ensures you can:

  • Protect your loved ones and pets.
  • Minimize property damage.
  • Recover more quickly after the event.

The good news? With the right plan and tools, you can reduce the risks and handle an emergency with confidence.

Step 1: Assess Your Risks

Identify common disasters in your area

Not all natural disasters are created equal—your personal level of risk depends largely on where you live. For example:

  • Hurricanes are most common along the Gulf Coast and Atlantic seaboard.
  • Earthquakes pose the greatest threat in areas like California and Alaska.
  • Wildfires frequently occur in regions with dry, hot climates, such as the western United States.
  • Floods can happen anywhere but are particularly common in low-lying areas or places with heavy rainfall.

Check your local government website or FEMA’s Disaster Risk Map for specific risks in your community.

Evaluate your home’s vulnerabilities

Your home is your first line of defense in a disaster. Assess it to identify weak points:

  • Are your doors and windows sealed against water or wind?
  • Does your roof meet current code requirements for your area’s specific risks?
  • Is your home located in a flood zone or near flammable brush?

This assessment gives you a clearer idea of where to start making improvements.

Step 2: Build a Disaster Supply Kit

A well-stocked disaster supply kit is essential for weathering any emergency. Aim for enough supplies to last at least 72 hours. Here’s what you’ll need:

Basic essentials

  • Water (1 gallon per person per day for at least 3 days)
  • Non-perishable food (e.g., canned goods, granola bars, freeze-dried meals)
  • Flashlights with extra batteries
  • Multi-purpose tool or Swiss Army knife
  • Portable phone chargers or power banks
  • First-aid kit

Personal care items

  • Medications (prescriptions and over-the-counter)
  • Hygienic supplies (toothbrush, toothpaste, wet wipes, etc.)
  • Spare glasses or contact lenses
  • Masks to protect from dust, especially in wildfires

Important documents

Store critical documents in a waterproof, portable container. Include:

  • Personal identification (e.g., driver’s licenses, passports)
  • Insurance policies and property deeds
  • Medical records
  • Emergency contact list

Extras for families and pets

Got pets or small children? Add:

  • Baby food or formula and diapers
  • Pet food and a leash
  • Comfort items like toys or blankets

Store your kit in an easy-to-access location and review its contents every six months to replace expired items.

Step 3: Make a Family Emergency Plan

When disaster strikes, every second matters. That’s why a clear emergency plan is critical. Follow these steps to ensure everyone in your household knows what to do:

Establish communication

  • Identify an emergency contact: Choose someone outside your immediate area who can act as a central point of contact for your family.
  • Create a group text thread: Use it to share updates and confirm everyone is safe.

Determine evacuation routes

  • Familiarize yourself with local evacuation routes and shelters.
  • Practice these routes with your family, including backup options in case the primary path becomes inaccessible.

Decide on a safe meeting spot

Choose two meeting locations:

  • One near your home in case of sudden events like a fire.
  • Another outside your neighborhood in case of a major evacuation.

Know how to shut off utilities

Fires and floods can cause electrical and gas hazards. Teach every capable household member how to shut off the following:

  • Water: Locate your main valve.
  • Electricity: Find your circuit board.
  • Gas: Learn how to properly turn off your gas line (and only turn it back on with the assistance of a professional).

Step 4: Strengthen Your Home Against Disaster

Your home can be your shelter—if it’s properly fortified. These steps can reduce potential damage:

Protect against floods

  • Elevate electrical outlets, appliances, and wiring above flood level.
  • Install sump pumps and consider adding flood vents.

Prepare for storms and winds

  • Install storm shutters on windows or keep plywood ready.
  • Secure heavy furniture, like bookcases, to the wall to prevent tipping.

Fireproof your property

  • Remove dry vegetation and brush at least 30 feet from your property.
  • Install fire-resistant roofing materials like asphalt shingles or metal.

Earthquake-proof your home

  • Use straps to secure heavy furniture and appliances.
  • Brace your chimney and water heater.

Step 5: Stay Alert and Stay Safe

Finally, ensure you’re equipped to stay informed and make quick decisions during a disaster.

Sign up for emergency alerts

  • Sign up for alerts from services like FEMA, the Red Cross, or your local government. Many will send text or email updates directly to your phone.

Use reliable information sources

Stick to trusted sources like:

  • NOAA Weather Radio
  • National Weather Service (NWS)
  • CDC and FEMA websites

Know when to evacuate

Pay attention to evacuation orders and warnings. If local authorities recommend leaving, don’t wait—evacuate immediately.

Keep cash on hand

ATMs and credit card systems often go offline during disasters. Having a supply of small bills can help you purchase necessities.

What to Do After the Disaster

Your work doesn’t end when the disaster passes. Here’s how to assess and recover:

  • Check yourself and loved ones for injuries.
  • Inspect your home for damage before re-entering.
  • Document any damage with photos for your insurance claim.
  • Reach out for assistance from local relief organizations.

Make Preparedness a Priority

Preparing for a natural disaster can feel overwhelming, but remember, every step you take now can save lives and property later. From building a disaster kit to creating an emergency plan, you have the tools to protect yourself and your loved ones.

Start small—review your home for vulnerabilities or put together your kit this weekend. The vital steps you take today will equip you to face tomorrow’s challenges with confidence.

Products:

12 Gauge Dragon’s Breath Shot Gun Ammunition

Videos:

Our YouTube Channel

Posted on

How to Prepare a 72-Hour Kit (Bug Out Bag) for Emergencies

bug out bag

Natural disasters, power outages, or unexpected emergencies can strike without warning. While we can’t always predict when these events will occur, we can prepare for them. A well-equipped 72-hour kit, often called a “bug out bag,” could be the difference between chaos and peace of mind during an emergency.

Whether you’re a seasoned prepper or just beginning to explore emergency preparedness, this guide will walk you through the essentials of creating a 72-hour kit that will keep you safe, comfortable, and ready for the unexpected.

What is a 72-Hour Kit or Bug Out Bag?

A 72-hour kit is a backpack or bag filled with essential items designed to sustain you for up to three days (72 hours) in an emergency situation. The idea is to have all the basics—food, water, clothing, tools, medical supplies—readily accessible so you can grab the bag and go if necessary.

The “bug out bag” concept originally gained popularity in prepper communities as a response to life-threatening scenarios where quick evacuation is required. However, 72-hour kits are now widely recognized as a practical emergency preparedness tool for everyone.

Why is a 72-Hour Kit Essential?

Emergencies—be they natural disasters, severe storms, or large-scale evacuations—often strike without warning. A 72-hour kit ensures you are equipped with everything you need to survive, stay safe, and manage the waiting period until help arrives or you regain access to regular services.

Key benefits of a 72-hour kit include:

  • Rapid response to evacuation orders.
  • Self-sufficiency when services like power, water, and stores are unavailable.
  • Peace of mind knowing you’re prepared for the unexpected.

Now that we’ve established why you need one, let’s focus on how to build an effective 72-hour kit.

How to Build Your 72-Hour Kit

1. Choose the Right Bag

Your 72-hour kit starts with a durable, comfortable, and spacious bag. Look for these features when selecting your bag:

  • Size: Ensure it’s large enough to hold all your essentials but not so bulky it becomes difficult to carry.
  • Compartments: A bag with multiple compartments helps organize your items for quick access.
  • Comfort: Look for padded shoulder straps, adjustable waist straps, and breathable material, especially if you’ll need to carry it for extended periods.

Great options include sturdy backpacks, tactical bags, or large hiking packs.

2. Water Supply is Critical

Water is one of the most critical components of survival. Include the following for your water needs:

  • Water bottles or hydration bladders (carry at least 1 gallon per day per person).
  • Water purification tablets or a portable water filtration system, such as a LifeStraw.
  • Collapsible water containers for extra storage if resources run low.

3. Pack Sustenance with Emergency Foods

Food should be lightweight, non-perishable, and easy to prepare. Examples include:

  • Energy bars or high-calorie meal bars.
  • Dehydrated or freeze-dried meals (just add hot water!).
  • Canned goods with pull-off lids (don’t forget a lightweight can opener if needed).
  • Trail mix, nuts, and dried fruit for snacks.

Ensure your food can last for at least 72 hours, and don’t forget utensils and a portable stove or heat source if required.

4. Clothing and Shelter

Pack lightweight, weather-appropriate clothing and gear to protect against the elements. Essentials include:

  • Seasonal layers such as thermal underwear and jackets for colder climates.
  • Extra sets of underwear and socks (wet feet can be painful and dangerous!).
  • Waterproof poncho or jacket for rain protection.
  • Emergency blanket or a small sleeping bag for warmth.
  • A compact tent or tarp for temporary shelter.

5. Comprehensive First Aid Kit

Minor injuries can quickly become serious in an emergency. A first aid kit is non-negotiable. Include items such as:

  • Band-aids, gauze, and medical tape.
  • Antiseptic wipes and antibiotic ointment.
  • Pain relievers and any prescription medications you require.
  • Tweezers, scissors, and disposable gloves.
  • CPR mask and emergency medical instructions.

6. Tools and Survival Gear

A few versatile tools go a long way. Here’s what to pack in your kit:

  • Multi-tool or Swiss Army knife for general utility.
  • Flashlight with extra batteries (or a crank/solar-powered flashlight).
  • Fire starters, such as waterproof matches, a lighter, or flint and steel.
  • Paracord for securing shelter, bundling items, or other makeshift uses.
  • Duct tape, which seems to fix almost anything.
  • A whistle to signal for help if needed.

7. Personal Hygiene Supplies

Hygiene is often overlooked in emergency kits but plays a critical role in maintaining health and morale. Pack the following items for basic cleanliness:

  • Travel-sized toiletries like toothpaste, soap, and deodorant.
  • Toilet paper or biodegradable wipes.
  • Hand sanitizer and disposable gloves.
  • Feminine hygiene products, if applicable.

8. Important Documents and Cash

Emergencies can mean banks are closed or ATMs are inaccessible. Keep copies of essential documents in a waterproof bag and include some cash. Examples include:

  • Identification documents (driver’s license, passport).
  • Medical records and prescriptions.
  • Insurance information.
  • Emergency contact numbers (written down—don’t rely solely on your phone).

9. Communication and Navigation Tools

Don’t get caught off guard if cell towers are down. Equip yourself with the following tools for communication and navigation:

  • Battery-powered radio or hand-crank radio to stay updated with emergency broadcasts.
  • Printed maps of your local area and evacuation routes.
  • Fully charged power bank for cell phone charging.

10. Tailor Your Kit to Your Needs

Every individual or family will have unique needs, so consider personalizing your 72-hour kit by including items such as:

  • Baby formula and diapers for those with infants.
  • Pet supplies if you have furry family members.
  • Entertainment, especially for kids (small toys or books).

Maintaining and Reviewing Your 72-Hour Kit

Your 72-hour kit isn’t something you can build once and forget about. Follow these steps to keep it in top condition:

  • Check expiration dates on food, water, and medications annually, and replace them as necessary.
  • Test your gear, such as flashlights and fire starters, to ensure they remain functional.
  • Update clothing and supplies as seasons change or as your family’s needs evolve.

Stay Prepared and Confident

Having a fully stocked and carefully organized 72-hour kit offers peace of mind and drastically improves your ability to respond to emergencies. Whether you’re evacuating due to a wildfire or facing a power outage after a storm, you can rest assured that you’re ready for whatever comes your way.

If you’re just starting, don’t feel overwhelmed—start small and build your kit over time. Stay prepared, stay safe, and take control of your preparedness today!

Products:

Rope and Cordage may come in handy for your Bug Out Bag. Click here to see our lineup. 

Cutlery and tools. 

12 Gauge Dragon’s Breath Shot Gun Ammunition for signaling

Videos:

Our YouTube Channel

Posted on

Mastering Self-Defense with NRA Courses for Gun Enthusiasts and Learners

Gun Safety

Mastering Self-Defense – Are you ready to take your self-defense skills to the next level? For gun enthusiasts, self-defense learners, and NRA members, enhancing your knowledge and skills in personal protection is crucial. The National Rifle Association (NRA) offers a comprehensive suite of self-defense courses designed specifically for law-abiding citizens seeking responsible firearm use. In this blog post, we’ll explore the prerequisites, objectives, and content of these NRA courses. You’ll discover how they can equip you with the resources you need to ensure safety and confidence in self-defense situations.

Understanding the Prerequisites

Before embarking on your self-defense training with the NRA, it’s essential to understand the prerequisites. These courses are tailored for individuals who prioritize safety and are committed to responsible firearm use. The NRA requires participants to be law-abiding adult citizens, ensuring a safe and secure learning environment for all involved. Additionally, having prior experience with firearms is recommended, as it lays the foundation for advanced training.

The NRA’s focus on prerequisites underscores its commitment to promoting responsible firearm ownership. By ensuring participants have a basic understanding of firearms, the courses can effectively build upon existing knowledge. This approach allows instructors to concentrate on teaching advanced self-defense techniques without revisiting fundamental principles. Furthermore, the prerequisites are designed to create a community of like-minded individuals who share a dedication to safe and responsible gun ownership.

For those new to firearms or seeking to refresh their knowledge, the NRA also offers introductory courses covering the basics. These foundational classes help ensure that all participants are on the same page before advancing to more complex self-defense training. By providing a clear path for learners of all experience levels, the NRA fosters a comprehensive and inclusive learning environment.

Defining the Objectives

The primary objective of NRA self-defense courses is to empower individuals with the knowledge and skills needed to protect themselves and their loved ones. These courses emphasize the importance of situational awareness and proactive decision-making in potentially dangerous situations. By focusing on prevention and preparedness, participants are better equipped to avoid conflicts and minimize risks.

Another critical objective of the NRA self-defense courses is to instill confidence in participants. Through hands-on training and real-life scenarios, learners develop the skills necessary to respond effectively in high-pressure situations. This confidence not only enhances personal safety but also contributes to a sense of empowerment and security in everyday life.

Lastly, NRA courses aim to promote a culture of responsible firearm ownership. By educating participants on the legal and ethical aspects of self-defense, these courses reinforce the importance of using firearms responsibly and within the boundaries of the law. This commitment to responsible ownership helps foster a safer community for all.

Exploring Course Content

NRA self-defense courses offer a comprehensive curriculum designed to address various aspects of personal protection. The content is meticulously crafted to ensure participants receive practical and relevant training tailored to real-world scenarios. By focusing on situational awareness, effective decision-making, and hands-on training, these courses equip learners with the skills to confidently handle self-defense situations.

One of the key elements of the course content is the emphasis on situational awareness. Participants learn to recognize potential threats and assess their environment to make informed decisions. By developing this heightened awareness, individuals can proactively avoid dangerous situations and reduce the likelihood of confrontation. This essential skill is reinforced through interactive exercises and real-life scenarios, providing valuable hands-on experience.

In addition to situational awareness, NRA courses focus on effective decision-making. Participants learn to assess potential threats, evaluate their options, and determine the most appropriate course of action. By practicing these decision-making skills, learners become better equipped to respond quickly and effectively in high-pressure situations. This training not only enhances personal safety but also fosters a sense of confidence and empowerment.

Hands-on training is another critical component of NRA self-defense courses. Participants engage in practical exercises designed to simulate real-life scenarios, allowing them to apply their skills in a controlled environment. This hands-on approach ensures that learners gain valuable experience, building the muscle memory necessary to respond instinctively in actual self-defense situations. Through repetition and practice, participants develop the confidence and competence needed to protect themselves and their loved ones.

Utilizing Available Resources

The NRA provides various resources to support participants in their self-defense training. These resources include instructional materials, expert instructors, and access to a community of like-minded individuals. By leveraging these resources, participants can maximize their learning experience and continue to develop their skills long after completing the courses.

Comprehensive instructional materials are a key resource provided by the NRA. These materials cover essential topics such as firearm safety, legal considerations, and self-defense techniques. Participants can use these resources to supplement their in-person training and reinforce their understanding of the course content. Additionally, the materials serve as a valuable reference for ongoing learning and skill development.

Expert instructors play a crucial role in NRA self-defense courses. These experienced professionals bring a wealth of knowledge and expertise, offering personalized guidance and support throughout the training process. By working closely with skilled instructors, participants can refine their techniques, address challenges, and gain confidence in their self-defense abilities.

The NRA community is another valuable resource for participants. By connecting with fellow learners and experienced firearms enthusiasts, individuals can share insights, exchange ideas, and learn from one another. This sense of community fosters collaboration and support, enabling participants to continue their self-defense journey with encouragement and motivation.

Conclusion

In conclusion, the NRA’s self-defense courses offer an invaluable opportunity for gun enthusiasts, self-defense learners, and NRA members to enhance their skills and confidence in personal protection. By focusing on situational awareness, effective decision-making, and hands-on training, these courses empower individuals to take control of their safety and protect their loved ones. With the support of expert instructors, comprehensive instructional materials, and a thriving community of like-minded individuals, participants can maximize their learning experience and continue to grow their self-defense skills.

Whether you’re new to firearms or an experienced shooter, the NRA’s self-defense courses provide a comprehensive and accessible way to boost your knowledge and confidence. By staying informed and proactive, you can make a meaningful impact on your own safety and contribute to a safer community for all. For those ready to take the next step, consider enrolling in an NRA self-defense course today and discover the benefits of becoming a more skilled and responsible firearm owner.

Sign up here for the NRA Basic Personal Protection Course

Products:

12 Gauge Dragon’s Breath Shot Gun Ammunition

Videos:

Our YouTube Channel

Posted on

Create a Fortress at Home with Practical Safety Measures

Home Security

Practical Safety Measures – In today’s world, ensuring your home’s safety has never been more crucial. Whether you’re a homeowner, a parent, or simply someone who takes a keen interest in security, understanding and implementing effective home defensive measures can offer peace of mind and protection for you and your loved ones. This blog post aims to guide you through a comprehensive exploration of home safety strategies, providing you with tangible steps to fortify your living space against potential hazards and intrusions.

Home is where the heart is, but it’s also where your most valuable possessions reside. For many, the idea of a secure home equates to a secure family. This post will walk you through an array of measures, from simple and cost-effective solutions to more advanced technologies, ensuring that everyone can find the right fit for their needs. By the end of this article, you’ll be equipped with the knowledge needed to make informed decisions on enhancing your home’s security.

Understanding the Importance of Home Security

Home security isn’t just about protecting valuables; it’s about creating a safe haven for your loved ones. The peace of mind that comes with knowing your home is secure is invaluable. But what exactly makes a home secure? It’s a mix of physical barriers, technological advancements, and personal habits that together form a robust defense strategy.

In recent years, statistics have shown that homes without security measures are three times more likely to be targeted by burglars. This staggering fact underscores the urgency of equipping your abode with the right protective measures. A well-secured home deters criminals, reduces the likelihood of break-ins, and enhances the overall safety of the neighborhood.

Additionally, the psychological benefits of a secure home should not be underestimated. Knowing that your family is protected allows you to focus on other aspects of life without the constant worry of potential threats. By investing time and resources into home security, you pave the way for a more tranquil and stress-free environment.

Assessing Your Current Security Status

Before making any improvements, it’s essential to evaluate your home’s existing security framework. Start by conducting a thorough inspection of your property. Look for vulnerabilities such as poorly lit areas, overgrown shrubs that could serve as hiding spots, or outdated locks on windows and doors. Identifying these weak points is the first step in fortifying your home.

Consider also the external factors, such as the neighborhood’s crime rate and the level of community vigilance. Are there neighborhood watch programs in place? Knowing the local security dynamics can help tailor your defensive measures accordingly.

Once you’ve pinpointed potential issues, prioritize them based on risk level. Address the most glaring vulnerabilities first, such as flimsy door locks or broken window latches. Creating a list of security improvements provides a clear roadmap for enhancing your home’s defenses.

Reinforcing Entry Points

The majority of break-ins occur through front doors, back doors, and windows. Strengthening these entry points is crucial in preventing unauthorized access. Begin with installing deadbolts and high-quality locks on all doors. Consider using longer screws in strike plates for added durability against forced entry.

Windows are often overlooked but are equally vulnerable. Reinforce them with window locks and security film, which can make glass shatter-resistant. For extra protection, consider installing window bars or grilles, especially for ground-level windows.

Sliding doors, due to their design, present a unique challenge. Installing a security bar or a rod in the track can prevent them from being easily forced open. By bolstering these key entry points, you make it significantly harder for potential intruders to gain access.

Enhancing Perimeter Security

Securing the perimeter of your property serves as the first line of defense against intruders. Start by evaluating your fencing or hedging. Ensure there are no gaps that could allow easy entry, and consider adding height to deter climbing. Thorny plants can also act as natural deterrents when strategically placed.

Installing motion-activated lights around the perimeter is another effective measure. These lights not only illuminate potential hiding spots but also startle intruders, drawing attention to their presence. Ensure that all pathways and entrances are well-lit to minimize shadowy areas.

CCTV cameras have become a staple in modern home security. Position cameras to cover all angles of your property, particularly entry points and blind spots. Choose systems with remote monitoring capabilities, allowing you to keep an eye on your home even when you’re away.

Utilizing Smart Home Technology

Incorporating smart home technology adds a layer of convenience and increased security to your home. Smart locks, for instance, allow you to control access remotely, whether you’re letting in a guest or ensuring you’ve locked up after leaving. These locks can also provide activity logs, alerting you to any unauthorized attempts.

Smart doorbells equipped with cameras enable you to see and communicate with visitors, even when you’re not home. Many systems offer motion detection alerts, keeping you informed of any activity at your doorstep.

Home automation systems can further bolster security by simulating occupancy. Automated lighting and sound systems can create the illusion of an occupied home, deterring potential intruders looking for empty properties.

Establishing a Security Routine

A routine that incorporates daily security checks can significantly enhance your home’s safety. Make it a habit to double-check that all doors and windows are locked before leaving or going to bed. Regularly test alarms and security systems to ensure they are functioning correctly.

Encourage family members to adopt these practices. Educate children about the importance of home security and set guidelines for opening doors to strangers or leaving the house unattended. A collective effort reinforces the overall security strategy.

Periodically review your security setup to adjust for any changes, such as new family members, pets, or renovations. Staying proactive and consistent in your approach to security will yield the best results.

Building a Community Support System

Engagement with your neighbors can greatly enhance your home’s security. A community that looks out for one another is less attractive to criminals. Participate in neighborhood watch programs and encourage communication among residents about suspicious activities.

Social media platforms and neighborhood apps offer a convenient way to share information and stay updated on local security concerns. By staying informed and connected, you contribute to a safer environment for everyone.

Additionally, fostering a sense of community can lead to collaborative efforts in improving neighborhood security, such as group investments in CCTV systems or organizing regular safety meetings.

Investing in Professional Security Services

While DIY measures are effective, professional security services can offer additional peace of mind. Consider hiring a security consultant to assess your home and provide tailored recommendations based on current trends and technologies.

Alarm system companies often provide 24/7 monitoring, alerting authorities immediately in the event of a break-in. This rapid response can be crucial in minimizing damage and loss.

Regular maintenance of security systems is essential to ensure optimal performance. Professional services can offer scheduled check-ups and upgrades, keeping your home protected against evolving threats.

Understanding Legal Implications

It’s important to be aware of the legal aspects of home security measures. Ensure that any installations, such as CCTV cameras, comply with local privacy laws. This includes positioning cameras so they do not infringe on neighbors’ privacy.

Understanding your rights and responsibilities as a homeowner can also inform your security strategy. In the event of an incident, knowing the legal procedures can guide your response and recovery.

Consulting with legal professionals or local authorities can provide clarity and help avoid potential legal pitfalls associated with certain security measures.

Balancing Security with Aesthetics

While security is paramount, it doesn’t have to come at the expense of your home’s aesthetic appeal. Many modern security products are designed to blend seamlessly with home decor. Choose options that complement your home’s style while offering robust protection.

For instance, decorative window grilles can enhance security while adding visual appeal. Smart technology devices are often sleek and unobtrusive, fitting into contemporary home designs.

Ultimately, the goal is to create a secure environment that feels welcoming and comfortable for you and your family. Striking a balance between security and aesthetics ensures that your home remains both beautiful and safe.

Maintaining a Long-Term Security Plan

Security needs evolve over time, making it essential to continually assess and update your strategies. Regularly revisit your security plan to accommodate any changes in lifestyle, property layout, or technological advancements.

Stay informed about the latest security trends and innovations. Subscribing to relevant publications or attending security expos can provide insights into new products and strategies.

By maintaining a long-term perspective, you ensure that your home remains a safe and secure haven for years to come. Being proactive and adaptive in your approach can protect against both current and future threats.

Conclusion

Creating a secure home environment is an ongoing process that requires a combination of awareness, technology, and community effort. By implementing the strategies discussed in this post, you can significantly enhance your home’s security and enjoy greater peace of mind. Remember, security is not a one-time task but a continuous commitment to safeguarding what matters most.

For those interested in further exploring home security solutions, consider reaching out to professional consultants or joining local security workshops. Together, we can build safer communities and protect our homes from threats.

Products:

12 Gauge Dragon’s Breath Shot Gun Ammunition

Videos:

Our YouTube Channel