Posted on

The Best Turkey Shot: Mastering the Art of an Ethical Hunt

Turkey hunting is an exhilarating and challenging experience that tests a hunter’s skill, patience, and precision. Whether you’re a seasoned professional or a beginner looking to bag your first turkey, one question always stands out in the field—what is the best turkey shot?

Knowing where and how to shoot a turkey ensures not only a successful hunt but also an ethical one that respects the animal. This blog will walk you through the anatomy of the perfect turkey shot, consider different scenarios, and give you strategies to make every hunt a satisfying one.

Understanding Turkey Anatomy for the Perfect Shot

Before you can hit the mark, you first need to understand your target’s anatomy. Turkeys are built differently from larger game animals like deer, so precision is non-negotiable. A poorly placed shot can lead to an injured bird that escapes rather than a clean harvest.

Turkey Vital Areas

The two most effective zones for a turkey shot are the vitals and the head/neck area:

  1. The Head and Neck

A shot to the head or neck is almost always a successful kill. The brain and spinal column in these areas make for an instant, ethical harvest if hit accurately. This is the preferred shot for hunters using shotguns because it provides a broad target with minimal meat waste.

  1. The Vital Organs (Heart and Lungs)

The heart and lungs are located just below and behind the wing’s base. This shot requires excellent precision and is ideal for bowhunters using broadhead arrows. A well-placed shot here ensures a quick and humane harvest.

Understanding the anatomy of these critical areas will give you the confidence to take the right shot, no matter the situation.

Choosing the Best Gear for a Clean Turkey Shot

The right equipment plays a key role in making an ethical shot. Whether you’re using a shotgun, a bow, or even hunting with air rifles, the gear you choose impacts your aim, range, and effectiveness.

Shotguns

The shotgun is by far the most popular choice for turkey hunting. Here’s what you need to know:

  • Gauge: A 12-gauge or 20-gauge shotgun is the most common choice for turkey hunters. The 20-gauge offers lighter recoil, while the 12-gauge packs more punch.
  • Choke Tubes: Opt for a turkey choke or an extra-full choke, designed to create a tight shot pattern that’s lethal for turkeys, even at longer ranges.
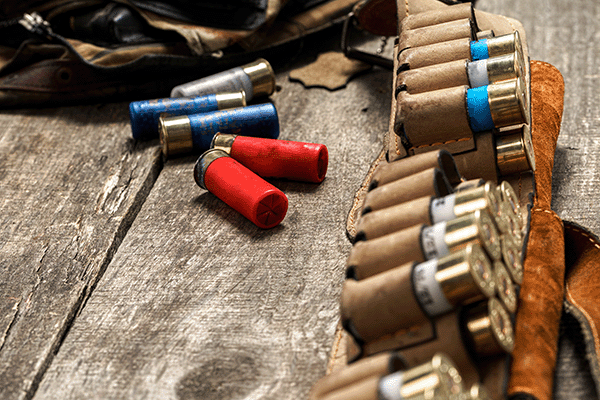
  • Ammo: Use specialized turkey loads, typically No. 4, 5, or 6 shot. These sizes offer the right balance of pellet count and stopping power.

Bows and Crossbows

Hunting turkeys with a bow adds a whole new level of challenge to your hunt. Here’s what you should consider:

  • Draw Weight: A lighter draw weight between 40–55 pounds is ideal; turkeys don’t require the same force as larger game.
  • Broadhead Tips: Use specialized mechanical or guillotine-style broadheads to ensure ethical kills with well-placed shots to the neck or vitals.
  • Accuracy: A bow requires precision, so practice regularly on turkey targets to improve your aim.

Air Rifles

Though not as common, some hunters use air rifles to hunt turkeys where legal. Precision is key here, so clean shots to the vitals or the base of the neck are required.

When to Take the Shot

Timing is just as crucial as accuracy when hunting turkeys. Recognizing the right moment ensures a clean, ethical shot with minimal stress to the bird.

Wait for the Perfect Position

Turkeys are skittish by nature, so it’s essential to shoot only when they are stationary or moving slowly. Ideally, you’ll want the bird to be standing broadside (perpendicular to you) or facing directly away. This provides a clear view of the vital areas or the base of the head and neck.

Mind the Distance

Knowing your effective range is critical. Most turkey hunters limit their shotgun range to 30-40 yards. Bowhunters should aim for 20-30 yards depending on their skills and equipment. Using a rangefinder can help you avoid misjudging distances.

Check for Obstructions

Turkeys are often hidden behind brush or other obstacles. Always ensure you have a clear shot and that your pellets or arrow won’t be deflected.

Advanced Tips for the Best Shot

Use Decoys to Control the Scenario

Decoys are invaluable tools for turkey hunters. By placing a hen decoy in a clear shooting lane, you’ll increase your chances of luring in a curious or aggressive gobbler. When the tom moves into position, you’ll have the time and clarity for a well-placed shot.

Learn the Art of Calling

Turkey calls—whether friction, box, or diaphragm—are excellent tools for bringing birds closer. Practice well ahead of the season to sound as authentic as possible. The closer the turkey gets, the higher your chances of making the perfect shot.

Practice Makes Perfect

The field isn’t the place to test your skills for the first time. Invest in realistic turkey targets (available for both shotguns and bows) and practice regularly. Aim for the head and neck with a shotgun, or the vital areas with a bow.

The Most Important Rule in Turkey Hunting

Above all, every ethical hunter must follow this cardinal rule—never take a questionable shot.

If the turkey is too far away, partially hidden, or moving erratically, don’t risk a bad shot. A true hunter respects the game and prioritizes a clean harvest over any personal ambition.

Why Ethical Hunting Matters

Ethical hunting ensures that wildlife is treated with respect and enables future generations to enjoy the pursuit as well. By educating yourself, practicing your skills, and making deliberate, well-thought-out decisions in the field, you contribute to the sustainability of this rewarding tradition.

Final Word on Perfecting Your Turkey Shot

From understanding turkey anatomy to gearing up and perfecting your aim, every step in the process matters when it comes to landing the best turkey shot. Patience, preparation, and practice will always yield the best results—and make your time in the great outdoors even more rewarding.

Now that you’re armed with this guide, it’s time to take your skills to the next level. Head into the field with confidence, knowing that your next turkey hunt will be an ethical and successful one. Happy hunting!

Products:

12 Gauge Dragon’s Breath Shot Gun Ammunition

Videos:

Our YouTube Channel

Posted on

How to Prepare for a Natural Disaster

Natural disaster

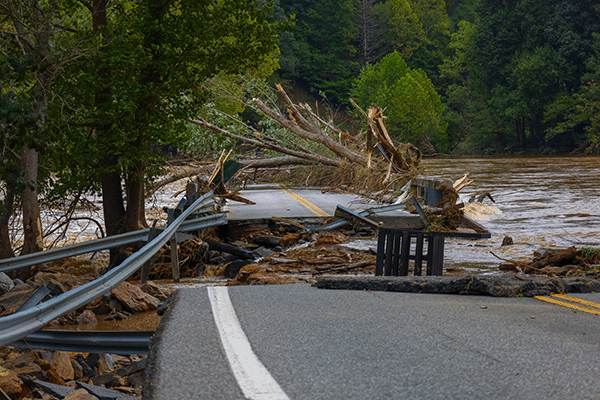
Prepare for a Natural Disaster – Natural disasters often strike with little to no warning, and while we can’t control them, we can control how we prepare. Whether it’s a hurricane, earthquake, wildfire, or flood, knowing what to expect and how to respond can make a life-saving difference.

This blog will walk you through essential steps to prepare for a natural disaster, offering practical advice for homeowners, families, and emergency preppers. From creating a disaster supply kit to putting together a family emergency plan, we’ve got you covered.

Why Preparing for a Natural Disaster Is Critical

Even with the best weather forecasting and emergency warnings, natural disasters can lead to chaos. The Federal Emergency Management Agency (FEMA) reports that nearly 60% of Americans say they’re not prepared for a disaster. This lack of preparation can result in property damage, financial losses, and, in extreme cases, loss of life.

Preparing ahead of time ensures you can:

  • Protect your loved ones and pets.
  • Minimize property damage.
  • Recover more quickly after the event.

The good news? With the right plan and tools, you can reduce the risks and handle an emergency with confidence.

Step 1: Assess Your Risks

Identify common disasters in your area

Not all natural disasters are created equal—your personal level of risk depends largely on where you live. For example:

  • Hurricanes are most common along the Gulf Coast and Atlantic seaboard.
  • Earthquakes pose the greatest threat in areas like California and Alaska.
  • Wildfires frequently occur in regions with dry, hot climates, such as the western United States.
  • Floods can happen anywhere but are particularly common in low-lying areas or places with heavy rainfall.

Check your local government website or FEMA’s Disaster Risk Map for specific risks in your community.

Evaluate your home’s vulnerabilities

Your home is your first line of defense in a disaster. Assess it to identify weak points:

  • Are your doors and windows sealed against water or wind?
  • Does your roof meet current code requirements for your area’s specific risks?
  • Is your home located in a flood zone or near flammable brush?

This assessment gives you a clearer idea of where to start making improvements.

Step 2: Build a Disaster Supply Kit

A well-stocked disaster supply kit is essential for weathering any emergency. Aim for enough supplies to last at least 72 hours. Here’s what you’ll need:

Basic essentials

  • Water (1 gallon per person per day for at least 3 days)
  • Non-perishable food (e.g., canned goods, granola bars, freeze-dried meals)
  • Flashlights with extra batteries
  • Multi-purpose tool or Swiss Army knife
  • Portable phone chargers or power banks
  • First-aid kit

Personal care items

  • Medications (prescriptions and over-the-counter)
  • Hygienic supplies (toothbrush, toothpaste, wet wipes, etc.)
  • Spare glasses or contact lenses
  • Masks to protect from dust, especially in wildfires

Important documents

Store critical documents in a waterproof, portable container. Include:

  • Personal identification (e.g., driver’s licenses, passports)
  • Insurance policies and property deeds
  • Medical records
  • Emergency contact list

Extras for families and pets

Got pets or small children? Add:

  • Baby food or formula and diapers
  • Pet food and a leash
  • Comfort items like toys or blankets

Store your kit in an easy-to-access location and review its contents every six months to replace expired items.

Step 3: Make a Family Emergency Plan

When disaster strikes, every second matters. That’s why a clear emergency plan is critical. Follow these steps to ensure everyone in your household knows what to do:

Establish communication

  • Identify an emergency contact: Choose someone outside your immediate area who can act as a central point of contact for your family.
  • Create a group text thread: Use it to share updates and confirm everyone is safe.

Determine evacuation routes

  • Familiarize yourself with local evacuation routes and shelters.
  • Practice these routes with your family, including backup options in case the primary path becomes inaccessible.

Decide on a safe meeting spot

Choose two meeting locations:

  • One near your home in case of sudden events like a fire.
  • Another outside your neighborhood in case of a major evacuation.

Know how to shut off utilities

Fires and floods can cause electrical and gas hazards. Teach every capable household member how to shut off the following:

  • Water: Locate your main valve.
  • Electricity: Find your circuit board.
  • Gas: Learn how to properly turn off your gas line (and only turn it back on with the assistance of a professional).

Step 4: Strengthen Your Home Against Disaster

Your home can be your shelter—if it’s properly fortified. These steps can reduce potential damage:

Protect against floods

  • Elevate electrical outlets, appliances, and wiring above flood level.
  • Install sump pumps and consider adding flood vents.

Prepare for storms and winds

  • Install storm shutters on windows or keep plywood ready.
  • Secure heavy furniture, like bookcases, to the wall to prevent tipping.

Fireproof your property

  • Remove dry vegetation and brush at least 30 feet from your property.
  • Install fire-resistant roofing materials like asphalt shingles or metal.

Earthquake-proof your home

  • Use straps to secure heavy furniture and appliances.
  • Brace your chimney and water heater.

Step 5: Stay Alert and Stay Safe

Finally, ensure you’re equipped to stay informed and make quick decisions during a disaster.

Sign up for emergency alerts

  • Sign up for alerts from services like FEMA, the Red Cross, or your local government. Many will send text or email updates directly to your phone.

Use reliable information sources

Stick to trusted sources like:

  • NOAA Weather Radio
  • National Weather Service (NWS)
  • CDC and FEMA websites

Know when to evacuate

Pay attention to evacuation orders and warnings. If local authorities recommend leaving, don’t wait—evacuate immediately.

Keep cash on hand

ATMs and credit card systems often go offline during disasters. Having a supply of small bills can help you purchase necessities.

What to Do After the Disaster

Your work doesn’t end when the disaster passes. Here’s how to assess and recover:

  • Check yourself and loved ones for injuries.
  • Inspect your home for damage before re-entering.
  • Document any damage with photos for your insurance claim.
  • Reach out for assistance from local relief organizations.

Make Preparedness a Priority

Preparing for a natural disaster can feel overwhelming, but remember, every step you take now can save lives and property later. From building a disaster kit to creating an emergency plan, you have the tools to protect yourself and your loved ones.

Start small—review your home for vulnerabilities or put together your kit this weekend. The vital steps you take today will equip you to face tomorrow’s challenges with confidence.

Products:

12 Gauge Dragon’s Breath Shot Gun Ammunition

Videos:

Our YouTube Channel

Posted on

How to Prepare a 72-Hour Kit (Bug Out Bag) for Emergencies

bug out bag

Natural disasters, power outages, or unexpected emergencies can strike without warning. While we can’t always predict when these events will occur, we can prepare for them. A well-equipped 72-hour kit, often called a “bug out bag,” could be the difference between chaos and peace of mind during an emergency.

Whether you’re a seasoned prepper or just beginning to explore emergency preparedness, this guide will walk you through the essentials of creating a 72-hour kit that will keep you safe, comfortable, and ready for the unexpected.

What is a 72-Hour Kit or Bug Out Bag?

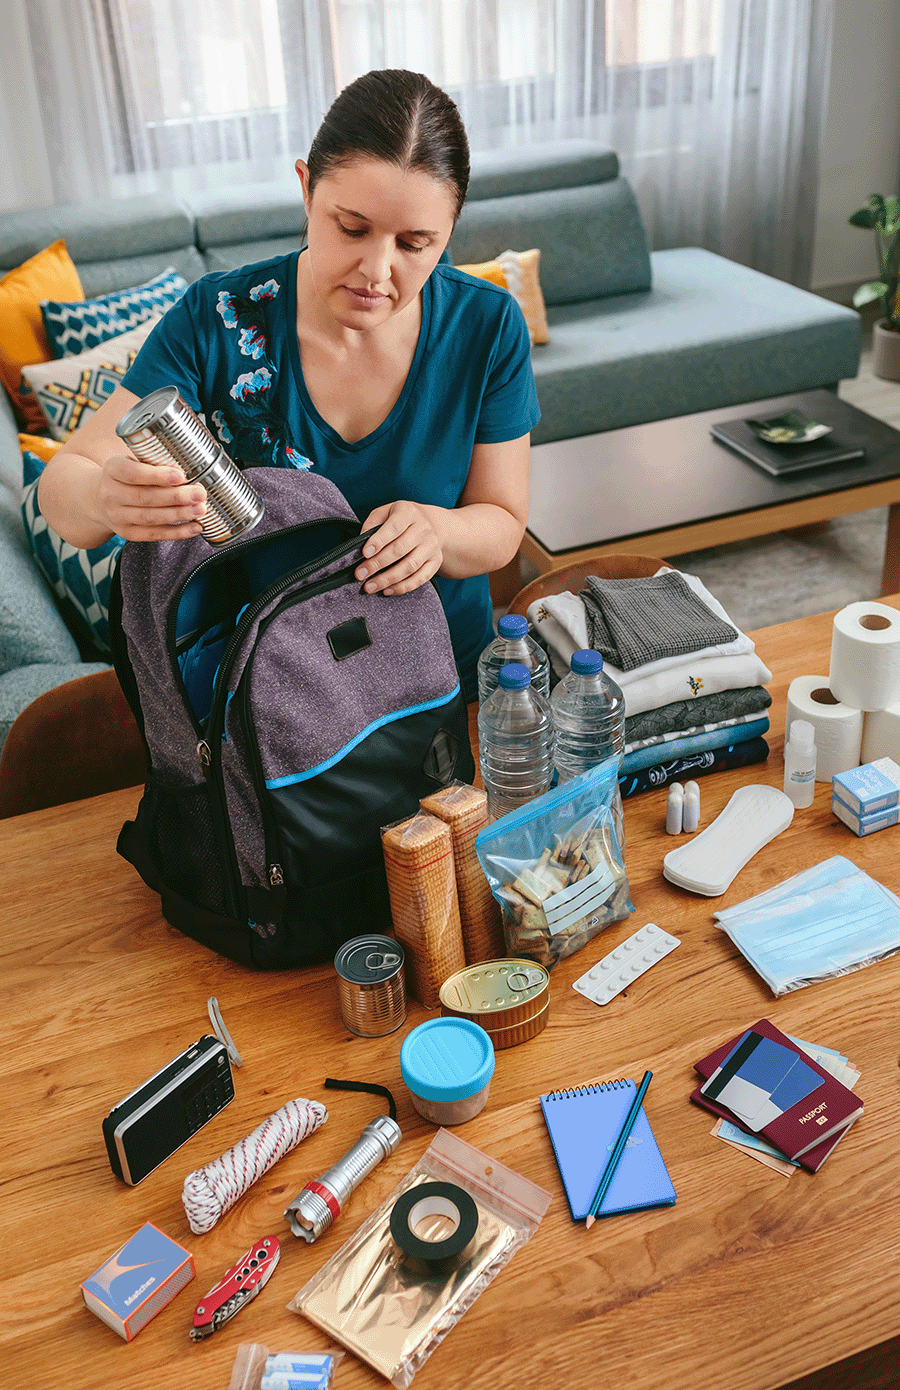
A 72-hour kit is a backpack or bag filled with essential items designed to sustain you for up to three days (72 hours) in an emergency situation. The idea is to have all the basics—food, water, clothing, tools, medical supplies—readily accessible so you can grab the bag and go if necessary.

The “bug out bag” concept originally gained popularity in prepper communities as a response to life-threatening scenarios where quick evacuation is required. However, 72-hour kits are now widely recognized as a practical emergency preparedness tool for everyone.

Why is a 72-Hour Kit Essential?

Emergencies—be they natural disasters, severe storms, or large-scale evacuations—often strike without warning. A 72-hour kit ensures you are equipped with everything you need to survive, stay safe, and manage the waiting period until help arrives or you regain access to regular services.

Key benefits of a 72-hour kit include:

  • Rapid response to evacuation orders.
  • Self-sufficiency when services like power, water, and stores are unavailable.
  • Peace of mind knowing you’re prepared for the unexpected.

Now that we’ve established why you need one, let’s focus on how to build an effective 72-hour kit.

How to Build Your 72-Hour Kit

1. Choose the Right Bag

Your 72-hour kit starts with a durable, comfortable, and spacious bag. Look for these features when selecting your bag:

  • Size: Ensure it’s large enough to hold all your essentials but not so bulky it becomes difficult to carry.
  • Compartments: A bag with multiple compartments helps organize your items for quick access.
  • Comfort: Look for padded shoulder straps, adjustable waist straps, and breathable material, especially if you’ll need to carry it for extended periods.

Great options include sturdy backpacks, tactical bags, or large hiking packs.

2. Water Supply is Critical

Water is one of the most critical components of survival. Include the following for your water needs:

  • Water bottles or hydration bladders (carry at least 1 gallon per day per person).
  • Water purification tablets or a portable water filtration system, such as a LifeStraw.
  • Collapsible water containers for extra storage if resources run low.

3. Pack Sustenance with Emergency Foods

Food should be lightweight, non-perishable, and easy to prepare. Examples include:

  • Energy bars or high-calorie meal bars.
  • Dehydrated or freeze-dried meals (just add hot water!).
  • Canned goods with pull-off lids (don’t forget a lightweight can opener if needed).
  • Trail mix, nuts, and dried fruit for snacks.

Ensure your food can last for at least 72 hours, and don’t forget utensils and a portable stove or heat source if required.

4. Clothing and Shelter

Pack lightweight, weather-appropriate clothing and gear to protect against the elements. Essentials include:

  • Seasonal layers such as thermal underwear and jackets for colder climates.
  • Extra sets of underwear and socks (wet feet can be painful and dangerous!).
  • Waterproof poncho or jacket for rain protection.
  • Emergency blanket or a small sleeping bag for warmth.
  • A compact tent or tarp for temporary shelter.

5. Comprehensive First Aid Kit

Minor injuries can quickly become serious in an emergency. A first aid kit is non-negotiable. Include items such as:

  • Band-aids, gauze, and medical tape.
  • Antiseptic wipes and antibiotic ointment.
  • Pain relievers and any prescription medications you require.
  • Tweezers, scissors, and disposable gloves.
  • CPR mask and emergency medical instructions.

6. Tools and Survival Gear

A few versatile tools go a long way. Here’s what to pack in your kit:

  • Multi-tool or Swiss Army knife for general utility.
  • Flashlight with extra batteries (or a crank/solar-powered flashlight).
  • Fire starters, such as waterproof matches, a lighter, or flint and steel.
  • Paracord for securing shelter, bundling items, or other makeshift uses.
  • Duct tape, which seems to fix almost anything.
  • A whistle to signal for help if needed.

7. Personal Hygiene Supplies

Hygiene is often overlooked in emergency kits but plays a critical role in maintaining health and morale. Pack the following items for basic cleanliness:

  • Travel-sized toiletries like toothpaste, soap, and deodorant.
  • Toilet paper or biodegradable wipes.
  • Hand sanitizer and disposable gloves.
  • Feminine hygiene products, if applicable.

8. Important Documents and Cash

Emergencies can mean banks are closed or ATMs are inaccessible. Keep copies of essential documents in a waterproof bag and include some cash. Examples include:

  • Identification documents (driver’s license, passport).
  • Medical records and prescriptions.
  • Insurance information.
  • Emergency contact numbers (written down—don’t rely solely on your phone).

9. Communication and Navigation Tools

Don’t get caught off guard if cell towers are down. Equip yourself with the following tools for communication and navigation:

  • Battery-powered radio or hand-crank radio to stay updated with emergency broadcasts.
  • Printed maps of your local area and evacuation routes.
  • Fully charged power bank for cell phone charging.

10. Tailor Your Kit to Your Needs

Every individual or family will have unique needs, so consider personalizing your 72-hour kit by including items such as:

  • Baby formula and diapers for those with infants.
  • Pet supplies if you have furry family members.
  • Entertainment, especially for kids (small toys or books).

Maintaining and Reviewing Your 72-Hour Kit

Your 72-hour kit isn’t something you can build once and forget about. Follow these steps to keep it in top condition:

  • Check expiration dates on food, water, and medications annually, and replace them as necessary.
  • Test your gear, such as flashlights and fire starters, to ensure they remain functional.
  • Update clothing and supplies as seasons change or as your family’s needs evolve.

Stay Prepared and Confident

Having a fully stocked and carefully organized 72-hour kit offers peace of mind and drastically improves your ability to respond to emergencies. Whether you’re evacuating due to a wildfire or facing a power outage after a storm, you can rest assured that you’re ready for whatever comes your way.

If you’re just starting, don’t feel overwhelmed—start small and build your kit over time. Stay prepared, stay safe, and take control of your preparedness today!

Products:

Rope and Cordage may come in handy for your Bug Out Bag. Click here to see our lineup. 

Cutlery and tools. 

12 Gauge Dragon’s Breath Shot Gun Ammunition for signaling

Videos:

Our YouTube Channel

Posted on

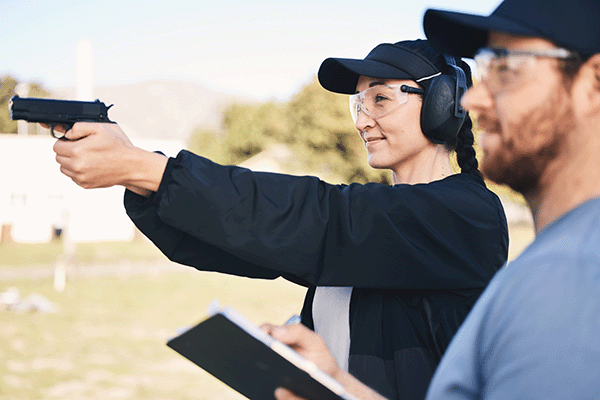
Mastering Self-Defense with NRA Courses for Gun Enthusiasts and Learners

Gun Safety

Mastering Self-Defense – Are you ready to take your self-defense skills to the next level? For gun enthusiasts, self-defense learners, and NRA members, enhancing your knowledge and skills in personal protection is crucial. The National Rifle Association (NRA) offers a comprehensive suite of self-defense courses designed specifically for law-abiding citizens seeking responsible firearm use. In this blog post, we’ll explore the prerequisites, objectives, and content of these NRA courses. You’ll discover how they can equip you with the resources you need to ensure safety and confidence in self-defense situations.

Understanding the Prerequisites

Before embarking on your self-defense training with the NRA, it’s essential to understand the prerequisites. These courses are tailored for individuals who prioritize safety and are committed to responsible firearm use. The NRA requires participants to be law-abiding adult citizens, ensuring a safe and secure learning environment for all involved. Additionally, having prior experience with firearms is recommended, as it lays the foundation for advanced training.

The NRA’s focus on prerequisites underscores its commitment to promoting responsible firearm ownership. By ensuring participants have a basic understanding of firearms, the courses can effectively build upon existing knowledge. This approach allows instructors to concentrate on teaching advanced self-defense techniques without revisiting fundamental principles. Furthermore, the prerequisites are designed to create a community of like-minded individuals who share a dedication to safe and responsible gun ownership.

For those new to firearms or seeking to refresh their knowledge, the NRA also offers introductory courses covering the basics. These foundational classes help ensure that all participants are on the same page before advancing to more complex self-defense training. By providing a clear path for learners of all experience levels, the NRA fosters a comprehensive and inclusive learning environment.

Defining the Objectives

The primary objective of NRA self-defense courses is to empower individuals with the knowledge and skills needed to protect themselves and their loved ones. These courses emphasize the importance of situational awareness and proactive decision-making in potentially dangerous situations. By focusing on prevention and preparedness, participants are better equipped to avoid conflicts and minimize risks.

Another critical objective of the NRA self-defense courses is to instill confidence in participants. Through hands-on training and real-life scenarios, learners develop the skills necessary to respond effectively in high-pressure situations. This confidence not only enhances personal safety but also contributes to a sense of empowerment and security in everyday life.

Lastly, NRA courses aim to promote a culture of responsible firearm ownership. By educating participants on the legal and ethical aspects of self-defense, these courses reinforce the importance of using firearms responsibly and within the boundaries of the law. This commitment to responsible ownership helps foster a safer community for all.

Exploring Course Content

NRA self-defense courses offer a comprehensive curriculum designed to address various aspects of personal protection. The content is meticulously crafted to ensure participants receive practical and relevant training tailored to real-world scenarios. By focusing on situational awareness, effective decision-making, and hands-on training, these courses equip learners with the skills to confidently handle self-defense situations.

One of the key elements of the course content is the emphasis on situational awareness. Participants learn to recognize potential threats and assess their environment to make informed decisions. By developing this heightened awareness, individuals can proactively avoid dangerous situations and reduce the likelihood of confrontation. This essential skill is reinforced through interactive exercises and real-life scenarios, providing valuable hands-on experience.

In addition to situational awareness, NRA courses focus on effective decision-making. Participants learn to assess potential threats, evaluate their options, and determine the most appropriate course of action. By practicing these decision-making skills, learners become better equipped to respond quickly and effectively in high-pressure situations. This training not only enhances personal safety but also fosters a sense of confidence and empowerment.

Hands-on training is another critical component of NRA self-defense courses. Participants engage in practical exercises designed to simulate real-life scenarios, allowing them to apply their skills in a controlled environment. This hands-on approach ensures that learners gain valuable experience, building the muscle memory necessary to respond instinctively in actual self-defense situations. Through repetition and practice, participants develop the confidence and competence needed to protect themselves and their loved ones.

Utilizing Available Resources

The NRA provides various resources to support participants in their self-defense training. These resources include instructional materials, expert instructors, and access to a community of like-minded individuals. By leveraging these resources, participants can maximize their learning experience and continue to develop their skills long after completing the courses.

Comprehensive instructional materials are a key resource provided by the NRA. These materials cover essential topics such as firearm safety, legal considerations, and self-defense techniques. Participants can use these resources to supplement their in-person training and reinforce their understanding of the course content. Additionally, the materials serve as a valuable reference for ongoing learning and skill development.

Expert instructors play a crucial role in NRA self-defense courses. These experienced professionals bring a wealth of knowledge and expertise, offering personalized guidance and support throughout the training process. By working closely with skilled instructors, participants can refine their techniques, address challenges, and gain confidence in their self-defense abilities.

The NRA community is another valuable resource for participants. By connecting with fellow learners and experienced firearms enthusiasts, individuals can share insights, exchange ideas, and learn from one another. This sense of community fosters collaboration and support, enabling participants to continue their self-defense journey with encouragement and motivation.

Conclusion

In conclusion, the NRA’s self-defense courses offer an invaluable opportunity for gun enthusiasts, self-defense learners, and NRA members to enhance their skills and confidence in personal protection. By focusing on situational awareness, effective decision-making, and hands-on training, these courses empower individuals to take control of their safety and protect their loved ones. With the support of expert instructors, comprehensive instructional materials, and a thriving community of like-minded individuals, participants can maximize their learning experience and continue to grow their self-defense skills.

Whether you’re new to firearms or an experienced shooter, the NRA’s self-defense courses provide a comprehensive and accessible way to boost your knowledge and confidence. By staying informed and proactive, you can make a meaningful impact on your own safety and contribute to a safer community for all. For those ready to take the next step, consider enrolling in an NRA self-defense course today and discover the benefits of becoming a more skilled and responsible firearm owner.

Sign up here for the NRA Basic Personal Protection Course

Products:

12 Gauge Dragon’s Breath Shot Gun Ammunition

Videos:

Our YouTube Channel

Posted on

Create a Fortress at Home with Practical Safety Measures

Home Security

Practical Safety Measures – In today’s world, ensuring your home’s safety has never been more crucial. Whether you’re a homeowner, a parent, or simply someone who takes a keen interest in security, understanding and implementing effective home defensive measures can offer peace of mind and protection for you and your loved ones. This blog post aims to guide you through a comprehensive exploration of home safety strategies, providing you with tangible steps to fortify your living space against potential hazards and intrusions.

Home is where the heart is, but it’s also where your most valuable possessions reside. For many, the idea of a secure home equates to a secure family. This post will walk you through an array of measures, from simple and cost-effective solutions to more advanced technologies, ensuring that everyone can find the right fit for their needs. By the end of this article, you’ll be equipped with the knowledge needed to make informed decisions on enhancing your home’s security.

Understanding the Importance of Home Security

Home security isn’t just about protecting valuables; it’s about creating a safe haven for your loved ones. The peace of mind that comes with knowing your home is secure is invaluable. But what exactly makes a home secure? It’s a mix of physical barriers, technological advancements, and personal habits that together form a robust defense strategy.

In recent years, statistics have shown that homes without security measures are three times more likely to be targeted by burglars. This staggering fact underscores the urgency of equipping your abode with the right protective measures. A well-secured home deters criminals, reduces the likelihood of break-ins, and enhances the overall safety of the neighborhood.

Additionally, the psychological benefits of a secure home should not be underestimated. Knowing that your family is protected allows you to focus on other aspects of life without the constant worry of potential threats. By investing time and resources into home security, you pave the way for a more tranquil and stress-free environment.

Assessing Your Current Security Status

Before making any improvements, it’s essential to evaluate your home’s existing security framework. Start by conducting a thorough inspection of your property. Look for vulnerabilities such as poorly lit areas, overgrown shrubs that could serve as hiding spots, or outdated locks on windows and doors. Identifying these weak points is the first step in fortifying your home.

Consider also the external factors, such as the neighborhood’s crime rate and the level of community vigilance. Are there neighborhood watch programs in place? Knowing the local security dynamics can help tailor your defensive measures accordingly.

Once you’ve pinpointed potential issues, prioritize them based on risk level. Address the most glaring vulnerabilities first, such as flimsy door locks or broken window latches. Creating a list of security improvements provides a clear roadmap for enhancing your home’s defenses.

Reinforcing Entry Points

The majority of break-ins occur through front doors, back doors, and windows. Strengthening these entry points is crucial in preventing unauthorized access. Begin with installing deadbolts and high-quality locks on all doors. Consider using longer screws in strike plates for added durability against forced entry.

Windows are often overlooked but are equally vulnerable. Reinforce them with window locks and security film, which can make glass shatter-resistant. For extra protection, consider installing window bars or grilles, especially for ground-level windows.

Sliding doors, due to their design, present a unique challenge. Installing a security bar or a rod in the track can prevent them from being easily forced open. By bolstering these key entry points, you make it significantly harder for potential intruders to gain access.

Enhancing Perimeter Security

Securing the perimeter of your property serves as the first line of defense against intruders. Start by evaluating your fencing or hedging. Ensure there are no gaps that could allow easy entry, and consider adding height to deter climbing. Thorny plants can also act as natural deterrents when strategically placed.

Installing motion-activated lights around the perimeter is another effective measure. These lights not only illuminate potential hiding spots but also startle intruders, drawing attention to their presence. Ensure that all pathways and entrances are well-lit to minimize shadowy areas.

CCTV cameras have become a staple in modern home security. Position cameras to cover all angles of your property, particularly entry points and blind spots. Choose systems with remote monitoring capabilities, allowing you to keep an eye on your home even when you’re away.

Utilizing Smart Home Technology

Incorporating smart home technology adds a layer of convenience and increased security to your home. Smart locks, for instance, allow you to control access remotely, whether you’re letting in a guest or ensuring you’ve locked up after leaving. These locks can also provide activity logs, alerting you to any unauthorized attempts.

Smart doorbells equipped with cameras enable you to see and communicate with visitors, even when you’re not home. Many systems offer motion detection alerts, keeping you informed of any activity at your doorstep.

Home automation systems can further bolster security by simulating occupancy. Automated lighting and sound systems can create the illusion of an occupied home, deterring potential intruders looking for empty properties.

Establishing a Security Routine

A routine that incorporates daily security checks can significantly enhance your home’s safety. Make it a habit to double-check that all doors and windows are locked before leaving or going to bed. Regularly test alarms and security systems to ensure they are functioning correctly.

Encourage family members to adopt these practices. Educate children about the importance of home security and set guidelines for opening doors to strangers or leaving the house unattended. A collective effort reinforces the overall security strategy.

Periodically review your security setup to adjust for any changes, such as new family members, pets, or renovations. Staying proactive and consistent in your approach to security will yield the best results.

Building a Community Support System

Engagement with your neighbors can greatly enhance your home’s security. A community that looks out for one another is less attractive to criminals. Participate in neighborhood watch programs and encourage communication among residents about suspicious activities.

Social media platforms and neighborhood apps offer a convenient way to share information and stay updated on local security concerns. By staying informed and connected, you contribute to a safer environment for everyone.

Additionally, fostering a sense of community can lead to collaborative efforts in improving neighborhood security, such as group investments in CCTV systems or organizing regular safety meetings.

Investing in Professional Security Services

While DIY measures are effective, professional security services can offer additional peace of mind. Consider hiring a security consultant to assess your home and provide tailored recommendations based on current trends and technologies.

Alarm system companies often provide 24/7 monitoring, alerting authorities immediately in the event of a break-in. This rapid response can be crucial in minimizing damage and loss.

Regular maintenance of security systems is essential to ensure optimal performance. Professional services can offer scheduled check-ups and upgrades, keeping your home protected against evolving threats.

Understanding Legal Implications

It’s important to be aware of the legal aspects of home security measures. Ensure that any installations, such as CCTV cameras, comply with local privacy laws. This includes positioning cameras so they do not infringe on neighbors’ privacy.

Understanding your rights and responsibilities as a homeowner can also inform your security strategy. In the event of an incident, knowing the legal procedures can guide your response and recovery.

Consulting with legal professionals or local authorities can provide clarity and help avoid potential legal pitfalls associated with certain security measures.

Balancing Security with Aesthetics

While security is paramount, it doesn’t have to come at the expense of your home’s aesthetic appeal. Many modern security products are designed to blend seamlessly with home decor. Choose options that complement your home’s style while offering robust protection.

For instance, decorative window grilles can enhance security while adding visual appeal. Smart technology devices are often sleek and unobtrusive, fitting into contemporary home designs.

Ultimately, the goal is to create a secure environment that feels welcoming and comfortable for you and your family. Striking a balance between security and aesthetics ensures that your home remains both beautiful and safe.

Maintaining a Long-Term Security Plan

Security needs evolve over time, making it essential to continually assess and update your strategies. Regularly revisit your security plan to accommodate any changes in lifestyle, property layout, or technological advancements.

Stay informed about the latest security trends and innovations. Subscribing to relevant publications or attending security expos can provide insights into new products and strategies.

By maintaining a long-term perspective, you ensure that your home remains a safe and secure haven for years to come. Being proactive and adaptive in your approach can protect against both current and future threats.

Conclusion

Creating a secure home environment is an ongoing process that requires a combination of awareness, technology, and community effort. By implementing the strategies discussed in this post, you can significantly enhance your home’s security and enjoy greater peace of mind. Remember, security is not a one-time task but a continuous commitment to safeguarding what matters most.

For those interested in further exploring home security solutions, consider reaching out to professional consultants or joining local security workshops. Together, we can build safer communities and protect our homes from threats.

Products:

12 Gauge Dragon’s Breath Shot Gun Ammunition

Videos:

Our YouTube Channel

Posted on

Best Ammunition for Self-Defense

Self Defense Rounds

Choosing the right ammunition for self-defense is a critical decision for firearm owners. Whether you’re protecting your home, your loved ones, or yourself, your choice of ammunition can directly impact the effectiveness of your weapon and the level of safety in dangerous situations. But with dozens of calibers, types, and brands available on the market, how do you decide what’s best for personal defense?

This blog provides a comprehensive guide to help firearm owners and personal safety advocates make informed decisions about the best ammunition for self-defense. From understanding the key factors to consider in selection to exploring the types of ammunition designed for defensive purposes, we’ll cover it all.

By the end of this post, you’ll be equipped with the knowledge you need to make the safest, most effective choice for protecting yourself and those you care about.

Key Factors to Consider for Self-Defense Ammunition

When it comes to self-defense ammunition, a few crucial factors can guide your decision-making process. These considerations help ensure that your ammo is reliable, effective, and suited to your personal needs.

Stopping Power

Stopping power refers to the ability of a bullet to incapacitate a threat quickly. While caliber size plays a role in stopping power, the ammunition’s design is just as important. Defensive rounds are typically engineered to expand upon impact, causing greater damage to the target and limiting the risk of over-penetration. For most firearm owners, hollow points are a popular choice due to their high stopping power.

Penetration Depth

A bullet used for self-defense should penetrate deep enough to hit vital organs, ensuring the immediate cessation of a threat. At the same time, it should not over-penetrate, as this could put bystanders at risk. The FBI recommends a penetration depth of 12 to 18 inches in gel tests as the ideal standard for defensive ammunition.

Reliability

Your ammunition must feed consistently and fire accurately every single time. An unreliable round can lead to failure-to-fire scenarios, which are unacceptable during self-defense situations. Always test your ammunition by firing a few boxes at the range to ensure it works well with your firearm.

Recoil Management

Recoil can affect follow-up shots and your overall accuracy. Depending on your experience level and firearm type, you may want to choose ammunition that balances performance with manageable recoil. For example, 9mm rounds are favored due to their relatively low recoil compared to larger calibers like .45 ACP.

Cost and Accessibility

Premium self-defense ammo can be pricey compared to regular full metal jacket (FMJ) rounds. However, for something as critical as personal safety, the investment is often worth it. Try to choose ammunition that’s consistently available in your area or online to avoid disruptions when replenishing your stock.

Popular Ammunition Types for Self-Defense

Now let’s examine some of the most popular ammunition types available for self-defense. Each type has unique features that make it more or less suitable, depending on your specific needs and preferences.

Hollow Point Rounds

Hollow point ammunition is widely regarded as the gold standard for self-defense. Upon impact, the hollow tip of the bullet expands, creating a larger wound channel and minimizing the chances of over-penetration. These rounds deliver a powerful combination of stopping power and controlled penetration, making them ideal for home and personal defense scenarios.

Popular Hollow Point Options:

  • Federal HST
  • Speer Gold Dot
  • Winchester PDX1 Defender

Full Metal Jacket (FMJ) Rounds

FMJ rounds feature a soft core (usually lead) encased in a harder metal shell. While FMJ bullets are inexpensive and reliable for practice, they’re not recommended for self-defense because they tend to over-penetrate, potentially endangering bystanders. However, they can still work in a pinch if no other option is available.

Jacketed Hollow Point (JHP)

Jacketed hollow points combine the best of both worlds—offering the controlled expansion of hollow points with a jacket of harder metal to ensure reliability and penetration. JHP rounds are an excellent choice for anyone prioritizing both performance and precision.

Popular JHP Rounds:

  • Hornady Critical Duty
  • Remington Golden Saber Bonded
  • Sig Sauer V-Crown

Frangible Rounds

Frangible ammunition is designed to disintegrate upon impact with hard surfaces, reducing the risk of wall penetration or ricochet. While frangible rounds are less powerful than hollow points, they are a safer choice for environments with dense populations or thin wall barriers.

+P and +P+ Ammunition

+P (“overpressure”) and +P+ ammunition are rounds loaded to create higher chamber pressure and velocity. These rounds deliver greater stopping power but may come with increased recoil and wear on your firearm. If you go this route, ensure your firearm is rated to handle +P ammo safely.

Recommended Calibers for Self-Defense

Another critical factor is choosing the right caliber for your firearm and personal needs. Below are the most common calibers used in self-defense situations:

9mm

Known for its balance of power, accuracy, and low recoil, the 9mm is the most popular caliber for self-defense. Its high magazine capacity and affordability make it an excellent choice for both beginners and experienced firearm owners.

Best 9mm Ammo for Self-Defense:

  • Federal Premium HST
  • Hornady Critical Defense
  • Speer Gold Dot

.45 ACP

The .45 ACP is favored for its massive stopping power but tends to produce more recoil. While fewer rounds can be carried in .45 ACP magazines, each shot delivers a significant punch.

Best .45 ACP Ammo for Self-Defense:

  • Winchester Black Talon
  • Federal Hydra-Shok
  • Hornady TAP FPD

.380 ACP

For those who prefer compact firearms, the .380 ACP is a lightweight and easily concealable option. While it may struggle with penetration compared to larger calibers, its reduced recoil makes it manageable for all experience levels.

Best .380 ACP Ammo for Self-Defense:

  • Remington Golden Saber
  • Hornady Custom XTP
  • Federal Hydra-Shok

.40 S&W

The .40 S&W is a middle ground between the 9mm and .45 ACP, offering a balanced mix of stopping power and recoil. It’s widely used by law enforcement agencies but may have stiffer recoil compared to the 9mm.

Best .40 S&W Ammo for Self-Defense:

  • Speer Gold Dot
  • Federal Premium Tactical Bonded
  • Winchester Ranger T-Series

Training and Practice Matter Too

Even the best ammunition cannot compensate for a lack of training and practice. If you’re serious about self-defense, spend time at the range practicing with the ammunition you plan to use in real-life scenarios. This ensures you are familiar with its performance and recoil characteristics. Regular practice will also help you build confidence and improve accuracy under pressure.

You may also consider taking self-defense shooting classes or working with a certified firearms instructor to enhance your skills. Remember, your safety doesn’t just depend on the tools you carry—it depends on how effectively you use them.

Equip Yourself with the Right Tools

Choosing the best ammunition for self-defense is about balancing stopping power, penetration, and reliability. Hollow points and jacketed hollow points remain the top choices for most firearm owners, delivering powerful yet controlled performance when it matters most. At the same time, calibers like the 9mm and .45 ACP offer a wide range of options to fit different needs and preferences.

Explore different options, test them at the range, and invest in your training to ensure you’re fully prepared for any situation. With the right tools and mindset, you can confidently protect yourself and those you care about.

Posted on

Top 10 Must-Have Items for Your Next Camping Adventure

Top 10 Must-Have Items

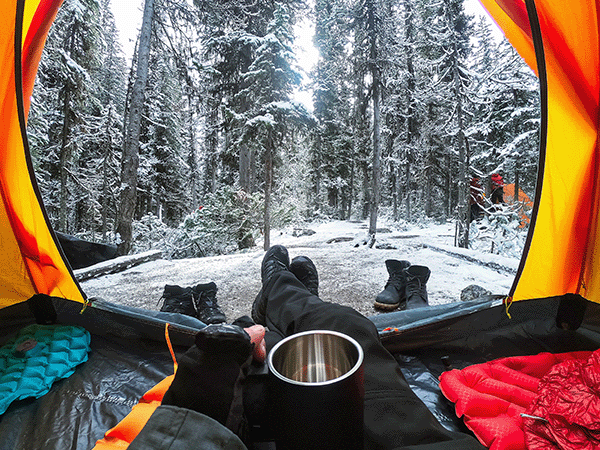
Camping is a wonderful way to disconnect from the daily grind and reconnect with nature, friends, and family. Whether you’re an experienced outdoor enthusiast or a family camper planning your first trip, having the right gear can make all the difference. In this listicle, we’ll explore the top 10 must-have items that will ensure your camping experience is comfortable, enjoyable, and safe. Let’s get started!

1. Reliable Tent and Rainfly

Your tent is your home away from home, so invest in a reliable one that suits your group’s size and needs. Look for features such as easy setup, durability, and ventilation. A high-quality rainfly is also crucial to keep you dry during unexpected downpours, making your stay comfortable no matter the weather.

2. Sleeping Bag and Pad

A good night’s sleep is vital for enjoying your camping adventure. Choose a sleeping bag with an appropriate temperature rating for the season and location. Complement it with a sleeping pad, which provides insulation from the cold ground and extra cushioning for comfort.

3. Portable Stove and Cookware

For hearty meals and warm beverages on the go, a portable stove is indispensable. Opt for lightweight, compact options like a backpacking stove or a propane stove. Pair it with durable cookware like a non-stick pan and a pot to make cooking in the wild a breeze. According to a survey by Statista, 51% of campers highlight cooking as their favorite outdoor activity.

4. First-Aid Kit

Safety should always be a priority when you’re outdoors. A well-stocked first-aid kit should include bandages, antiseptic wipes, tweezers, pain relievers, and any personal medications. Familiarize yourself with basic first-aid procedures before your trip.

5. Multi-Tool or Knife

A multi-tool or knife is a versatile and practical piece of gear that can assist with food preparation, gear repair, and other campsite tasks. Look for a sturdy option with multiple functions to cover all your needs. Here’s our favorite. 

6. Water Filtration System

Staying hydrated is crucial, especially when you’re active outdoors. While bottled water is convenient, it’s not always feasible for longer trips. A portable water filtration system or purification tablets can ensure you have access to safe drinking water from natural sources.

7. Headlamp or Flashlight

When the sun sets and darkness descends, you’ll need a reliable light source. A headlamp allows for hands-free operation, perfect for nighttime hikes or cooking. Ensure you have spare batteries or a charger if your device is rechargeable.

8. Weather-Appropriate Clothing and Footwear

Weather conditions can change rapidly outdoors. Pack clothing that can be layered, including moisture-wicking shirts, insulating layers, and a waterproof jacket. Sturdy, comfortable footwear appropriate for the terrain and activities is also essential.

9. Camping Chairs and Table

While not a necessity, camping chairs and a portable table bring an element of comfort to your campsite. They provide a place to relax, enjoy meals, and gather with your group, enhancing your overall experience.

10. Map and Compass

Even in our GPS-driven world, a traditional map and compass are invaluable tools for navigating wilderness areas where signal may be unreliable. Learn basic navigation skills to ensure you can confidently explore your surroundings.

By gearing up with these essential items, you’re well on your way to a successful camping trip filled with memorable moments and adventures. Now that you’re ready to pack, why not start planning your next outdoor getaway? Gather your gear, pick a destination, and immerse yourself in the beauty of nature. Adventure awaits!

Posted on

300 Blackout vs .556 Caliber for Home Defense: Which is Right for You?

Home Defense

When it comes to choosing the right caliber for home defense, the decision between the 300 Blackout and the .556 Caliber can be daunting. Both have their advocates, and both offer unique benefits that cater to different needs. In this comparison, we’ll explore these two options based on key factors like barrier defeat, terminal performance, barrier penetration, specific design, and accuracy to help you make a well-informed decision.

Barrier Defeat

300 Blackout: Known for its subsonic capabilities, the 300 Blackout is designed to perform well with a suppressor. Its heavier bullet tends to retain more energy when passing through barriers like walls or furniture, making it effective in barrier defeat scenarios. However, this can also present a risk of over-penetration in home defense situations.

.556 Caliber: The .556 round is lighter and typically has a higher velocity. This often results in less penetration through barriers, making it somewhat safer in a home environment where minimizing collateral damage is a priority. Its fragmentation upon impact can reduce the risk of over-penetration, potentially keeping family members in other rooms safer.

Terminal Performance

300 Blackout: Offers superior terminal ballistics due to its larger diameter and heavier bullet. This means greater stopping power and a higher likelihood of incapacitating an intruder. For self-defense advocates, this can be a crucial advantage.

.556 Caliber: While not as heavy as the 300 Blackout, the .556 Caliber’s high velocity and tendency to fragment upon impact can still deliver significant terminal performance. It’s known for effective stopping power, especially with high-quality defense ammunition.

Barrier Penetration

300 Blackout: Its ability to maintain lethality after penetrating barriers makes it a strong contender for those considering scenarios involving barriers or obstacles. However, this strength is a double-edged sword, as over-penetration could pose risks in residential settings.

.556 Caliber: Generally, the .556’s lighter rounds are more likely to fragment upon hitting a barrier, which can be advantageous in reducing unintended damage beyond the target.

Specific Design

300 Blackout: Originally designed for use in suppressed firearms, the 300 Blackout excels in suppressed shooting scenarios, offering reduced noise and recoil. This is a significant advantage for indoor situations where hearing protection might not be readily available.

.556 Caliber: Designed for military use, the .556 Caliber excels in versatility and ease of use in a wide variety of firearms, from rifles to carbines. Its availability and affordability make it a popular choice among enthusiasts.

Accuracy

300 Blackout: Generally offers good accuracy at short to medium ranges, which is practical for home defense. The subsonic rounds, when used with a suppressor, can further enhance accuracy by reducing recoil.

.556 Caliber: Known for its accuracy over longer distances, the .556 is highly effective in various settings, though some might find its performance lacking compared to 300 Blackout in close quarters.

Conclusion

When choosing between the 300 Blackout and .556 Caliber for home defense, consider the specific needs of your household and your comfort level with each caliber.

  • Choose the 300 Blackout if you’re looking for maximum stopping power, superior terminal performance, and plan to use a suppressor for quieter operation. Be mindful of the potential for over-penetration, and ensure your home setup minimizes risks.
  • Choose the .556 Caliber if you prioritize reducing the risk of over-penetration and value versatility across different firearm platforms. Its affordability and high availability make it an attractive option for those starting their home defense preparations.

Both calibers offer distinct advantages, so consider factors such as your living environment, personal skill level, and specific defense needs when making your choice. Ultimately, the right option is the one that aligns best with your individual circumstances and provides peace of mind.

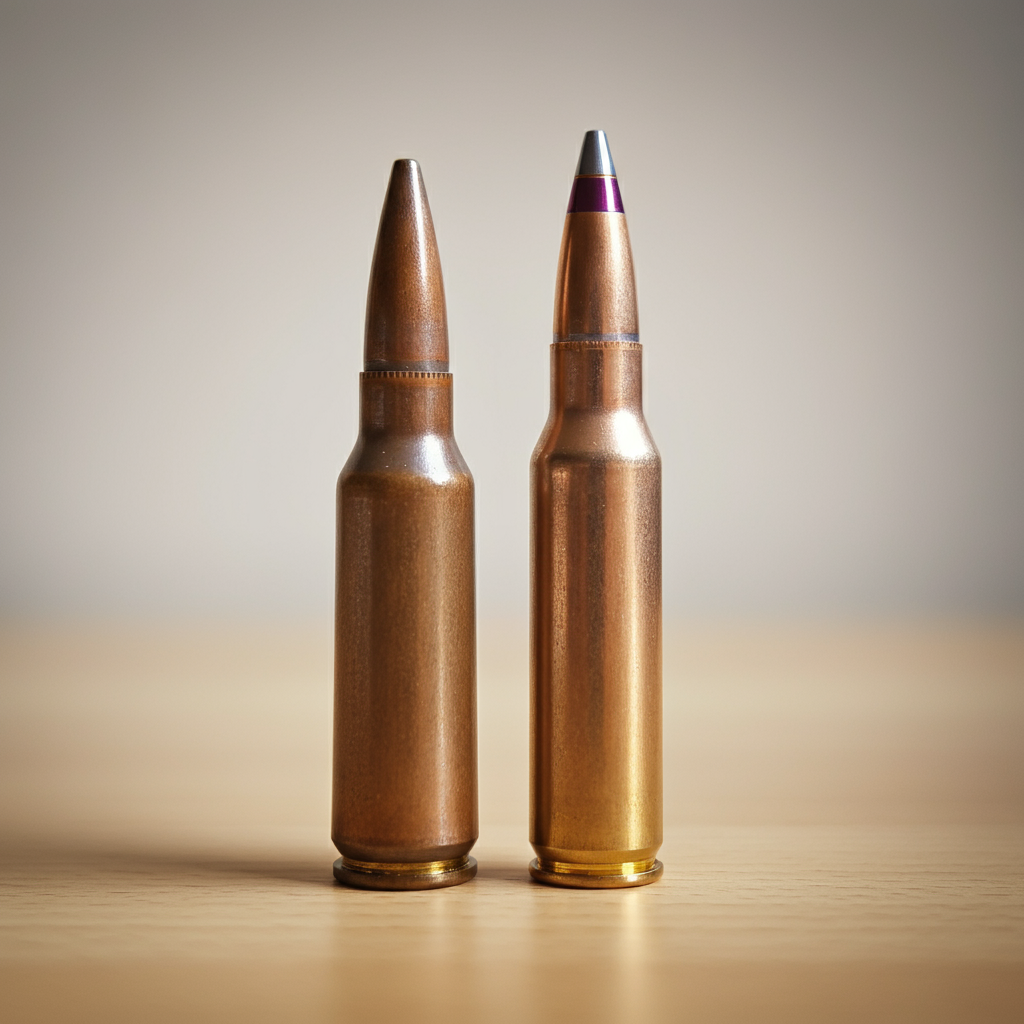
Here’s some 300 AAC Blackout, just because.  

…. and some .556, why not? 

Posted on

Mastering the Art of Field Dressing Game for the Modern Hunter 

Field dressing game is a crucial skill for hunters, outdoor enthusiasts, and sustainable living advocates. Proper field dressing ensures the quality of the meat, reduces waste, and honors the animal. Whether you’re new to hunting or a seasoned pro looking to refine your techniques, this guide will walk you through the essential steps and considerations for field dressing game. Let’s get started! 

Why Field Dressing Matters 

Field dressing isn’t just about removing organs; it’s about preserving the quality of the meat. Improper handling can lead to contamination, spoilage, and a less-than-pleasant dining experience. By mastering field dressing, you contribute to sustainable hunting practices and ensure every part of the animal is used effectively. 

Preparing for the Hunt 

Before heading out, make sure you have the right tools and knowledge. Carrying a well-stocked hunting kit can make the difference between a smooth process and a challenging one. Essentials include a sharp knife, gloves, a clean cloth, and a game bag. Familiarize yourself with the anatomy of the game you’ll be hunting to streamline the process. 

Choosing the Right Knife 

A sharp, sturdy knife is your best friend during field dressing. Opt for a fixed-blade knife with a comfortable grip. The blade should be long enough to handle larger game but versatile enough for precision work. Regularly sharpen your knife to maintain its effectiveness and safety. 

Safety First 

Safety can’t be overstated when it comes to field dressing. Wear gloves to protect against bacteria and parasites. Always cut away from your body and be mindful of your hand placement. Keeping your knife sharp reduces the risk of slips and cuts, making the entire process safer. 

The Initial Cut 

Start by positioning the animal on its back with its legs spread. Make an incision just below the breastbone, being careful not to puncture the stomach or intestines. A gentle touch is crucial to avoid contaminating the meat with digestive contents. Extend the cut down to the pelvic bone. 

Removing the Organs 

Carefully reach inside the chest cavity and sever the windpipe and esophagus. This allows for easier removal of the internal organs. Work methodically to remove the heart, lungs, liver, and other organs, placing them in a separate game bag if you plan to use them. Keep an eye out for signs of disease or abnormalities. 

Handling the Intestines 

The intestines require careful handling to prevent contamination. Gently pull them away from the body cavity, cutting any connective tissue as you go. Dispose of them responsibly, following local regulations and guidelines. This step is crucial for maintaining the quality of the meat. 

Cooling the Carcass 

Cooling the carcass quickly is essential to prevent spoilage. If you’re in a warm climate, place ice packs around the cavity or submerge the carcass in cool water. In colder environments, hanging the carcass in a shaded, breezy area can suffice. Aim to keep the meat at a temperature below 40°F (4°C). 

Skinning the Game 

Skinning the animal can be done immediately after field dressing or later, depending on your circumstances. Start at the initial incision and work your way around the body, using your knife to separate the skin from the muscle. Take care to avoid damaging the meat. 

Transporting the Meat 

Transporting your game safely is the final crucial step. Use a clean game bag or cooler to keep the meat fresh. Avoid exposing the meat to heat, dirt, or pests during transport. If possible, process the meat as soon as you reach your destination to ensure the best quality. 

Cleaning Up 

Sanitation is vital after field dressing. Clean your tools thoroughly with hot, soapy water and disinfect them. Wash your hands and any surfaces that came into contact with the game. Proper clean-up minimizes the risk of bacterial contamination and keeps your equipment in top condition. 

Understanding Local Regulations 

Different regions have varying regulations regarding hunting and field dressing. Familiarize yourself with local laws to ensure compliance. This includes knowing where you can dispose of animal remains and any specific guidelines for field dressing particular species. 

Honoring the Animal 

Field dressing is not just a technical skill; it’s a practice rooted in respect for the animal. Take a moment to appreciate the life taken and aim to use as much of the animal as possible. This mindset promotes sustainable hunting and a deeper connection to nature. 

Tips for Different Game 

Field dressing techniques can vary depending on the type of game. For instance, small game like rabbits require a different approach than larger animals like deer. Adjust your methods accordingly and seek advice from experienced hunters if you’re unsure. 

Troubleshooting Common Issues 

Every hunter encounters challenges in the field. Whether it’s dealing with a stubborn hide or unexpected weather conditions, being prepared can make a significant difference. Learn from each experience and continually improve your skills. 

In conclusion, field dressing game is an essential skill for anyone passionate about hunting and sustainable living. By following these steps, you ensure the quality of the meat, honor the animal, and contribute to ethical hunting practices. Ready to take your skills to the next level? Join our community of like-minded enthusiasts and start refining your field dressing techniques today! 


Products:  12 Gauge Dragon’s Breath Shot Gun Ammunition 


Videos:  Our YouTube Channel , Rumble


Posted on

Finding Your Perfect Gun Range for a Safe and Enjoyable Shooting Experience 

Are you eager to find the perfect gun range that combines safety, enjoyment, and a welcoming environment? Whether you’re a seasoned enthusiast or a first-time shooter, selecting a gun range that aligns with your needs is crucial. Let’s explore how to make an informed choice and ensure your shooting experience is both thrilling and secure. 

Understanding the Importance of a Good Gun Range 

Choosing the right gun range is not just about convenience; it’s about safety and skill enhancement. A reputable range provides a controlled environment where shooters of all levels can practice safely. It also ensures that proper guidelines and regulations are followed, minimizing risks and fostering a community where everyone feels comfortable and respected. 

Researching Local Gun Ranges 

Start by researching the gun ranges in your area. Look for reviews and ratings online, and ask for recommendations from fellow enthusiasts. Pay attention to comments about safety protocols, cleanliness, and overall experience. This initial step will help you create a shortlist of potential ranges to visit. 

Evaluating Safety Measures and Protocols 

Safety should be your top priority when choosing a gun range. Ensure the range has strict safety measures in place, such as mandatory safety briefings for all shooters, clear signage, and well-defined shooting lanes. Check if there are range officers present to enforce rules and provide assistance. 

Facilities and Equipment Quality 

The quality of the facilities and equipment can significantly impact your shooting experience. Look for ranges that offer clean, well-maintained shooting areas and modern equipment. Some ranges provide rental firearms, targets, and protective gear, which can be particularly useful for first-time shooters. 

Range Rules and Regulations 

Every gun range has its own set of rules and regulations. Familiarize yourself with these rules before committing to a range. Rules may include specific calibers allowed, shooting positions, and range etiquette. Adhering to these rules ensures a safe and enjoyable experience for everyone. 

Instructor Expertise and Availability 

Having qualified instructors available can make a big difference, especially for beginners. Check if the range offers training sessions and courses led by certified instructors. These professionals can provide valuable guidance and help improve your skills while ensuring safety. 

Community and Atmosphere 

The atmosphere of a gun range can greatly influence your overall experience. Look for a range that fosters a positive and inclusive community. Whether you’re a novice or a veteran shooter, a welcoming environment can make your time at the range more enjoyable and productive. 

Membership Options and Pricing 

Consider the membership options and pricing structures of different gun ranges. Some ranges offer memberships that include benefits like discounted rates, priority access, and exclusive events. Compare these options to find a range that fits your budget and offers the best value. 

Accessibility and Location 

The location and accessibility of the gun range are practical factors to consider. Choose a range that is conveniently located and easily accessible. This ensures you can visit the range regularly without too much hassle, allowing for consistent practice and improvement. 

Special Features and Services 

Some gun ranges offer unique features and services that can enhance your experience. Look for ranges that provide amenities such as private shooting bays, advanced target systems, and special events. These additional offerings can make your visits more enjoyable and engaging. 

Environmental Considerations 

It’s essential to consider the environmental impact of the gun range. Check if the range has measures in place to minimize lead contamination and other environmental hazards. A responsible range will have protocols for proper waste disposal and maintaining a clean environment. 

Insurance and Liability 

Ensure the gun range has adequate insurance coverage and liability protection. This is crucial for your safety and peace of mind. A well-insured range demonstrates a commitment to maintaining high safety standards and protecting its patrons. 

Customer Support and Assistance 

Good customer support can greatly enhance your experience at the gun range. Look for ranges that offer friendly and helpful staff who are readily available to answer questions and provide assistance. Excellent customer service reflects the range’s dedication to providing a positive experience. 

Scheduling and Availability 

Consider the range’s operating hours and availability. Some ranges may require reservations, while others operate on a first-come, first-served basis. Choose a range with flexible scheduling that aligns with your availability, making it easier to plan your visits. 

Checking for Compliance and Certifications 

Verify that the gun range complies with all relevant local, state, and federal regulations. Look for certifications from reputable organizations such as the National Rifle Association (NRA) or the National Shooting Sports Foundation (NSSF). These certifications indicate a commitment to maintaining high standards of safety and professionalism. 

In summary, finding the perfect gun range involves careful consideration of various factors, including safety protocols, facilities, instructor expertise, and community atmosphere. By conducting thorough research and evaluating these aspects, you can select a range that enhances your shooting experience while ensuring safety and enjoyment. 

Ready to take the next step? Visit your shortlisted ranges, ask questions, and observe their operations. Remember, the right gun range will not only help you improve your skills but also provide a safe and supportive environment for all your shooting adventures. Happy shooting! 

Here are some links for you:

Wheretoshoot.org  
USCCA

Products: 
12 Gauge Dragon’s Breath Shot Gun Ammunition 

 Videos: 
Our YouTube Channel