Posted on

How to Prepare for a Natural Disaster

Natural disaster

Prepare for a Natural Disaster – Natural disasters often strike with little to no warning, and while we can’t control them, we can control how we prepare. Whether it’s a hurricane, earthquake, wildfire, or flood, knowing what to expect and how to respond can make a life-saving difference.

This blog will walk you through essential steps to prepare for a natural disaster, offering practical advice for homeowners, families, and emergency preppers. From creating a disaster supply kit to putting together a family emergency plan, we’ve got you covered.

Why Preparing for a Natural Disaster Is Critical

Even with the best weather forecasting and emergency warnings, natural disasters can lead to chaos. The Federal Emergency Management Agency (FEMA) reports that nearly 60% of Americans say they’re not prepared for a disaster. This lack of preparation can result in property damage, financial losses, and, in extreme cases, loss of life.

Preparing ahead of time ensures you can:

  • Protect your loved ones and pets.
  • Minimize property damage.
  • Recover more quickly after the event.

The good news? With the right plan and tools, you can reduce the risks and handle an emergency with confidence.

Step 1: Assess Your Risks

Identify common disasters in your area

Not all natural disasters are created equal—your personal level of risk depends largely on where you live. For example:

  • Hurricanes are most common along the Gulf Coast and Atlantic seaboard.
  • Earthquakes pose the greatest threat in areas like California and Alaska.
  • Wildfires frequently occur in regions with dry, hot climates, such as the western United States.
  • Floods can happen anywhere but are particularly common in low-lying areas or places with heavy rainfall.

Check your local government website or FEMA’s Disaster Risk Map for specific risks in your community.

Evaluate your home’s vulnerabilities

Your home is your first line of defense in a disaster. Assess it to identify weak points:

  • Are your doors and windows sealed against water or wind?
  • Does your roof meet current code requirements for your area’s specific risks?
  • Is your home located in a flood zone or near flammable brush?

This assessment gives you a clearer idea of where to start making improvements.

Step 2: Build a Disaster Supply Kit

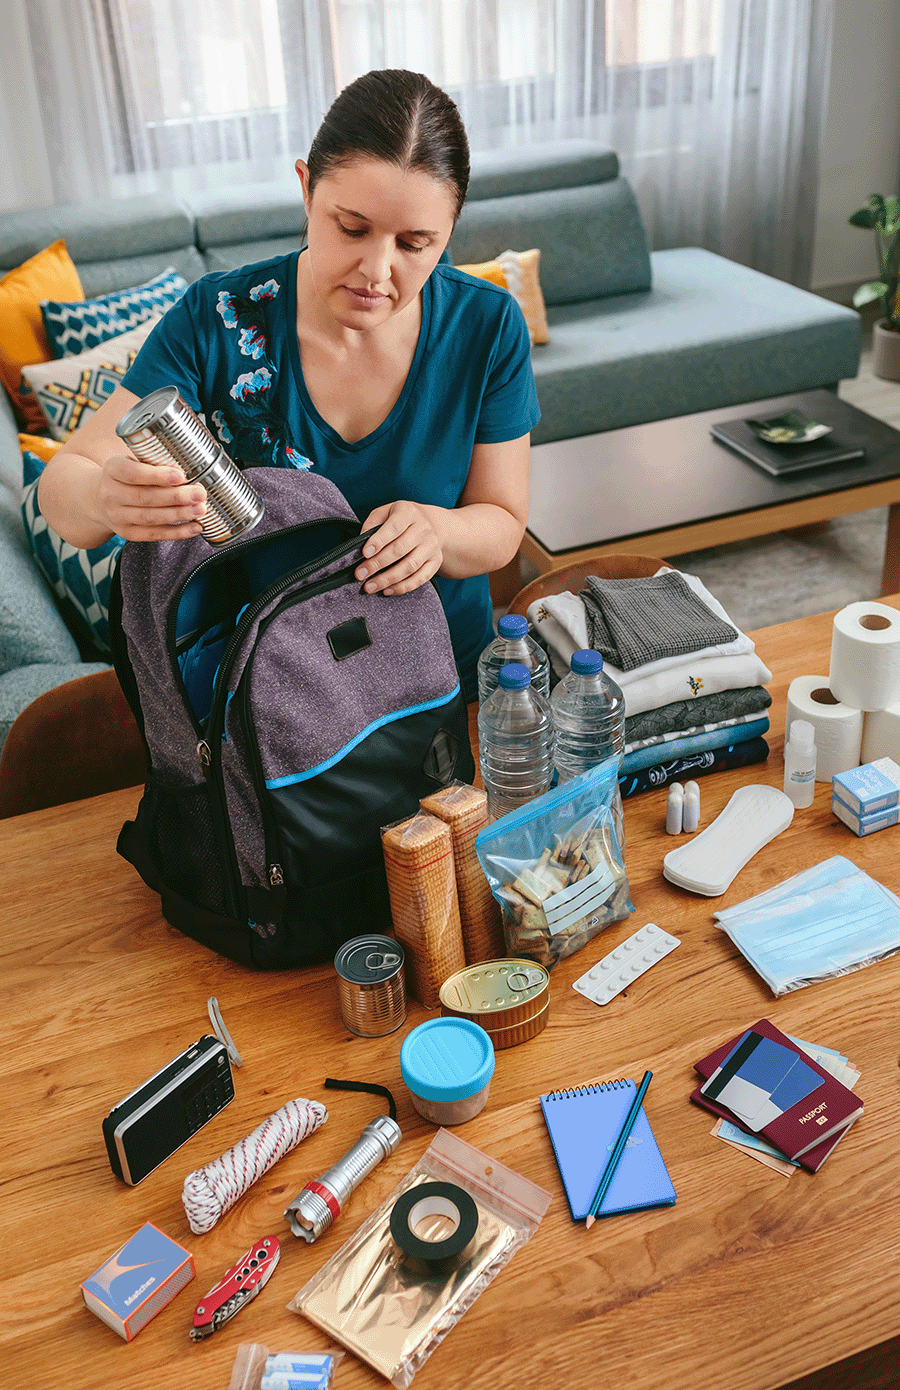
A well-stocked disaster supply kit is essential for weathering any emergency. Aim for enough supplies to last at least 72 hours. Here’s what you’ll need:

Basic essentials

  • Water (1 gallon per person per day for at least 3 days)
  • Non-perishable food (e.g., canned goods, granola bars, freeze-dried meals)
  • Flashlights with extra batteries
  • Multi-purpose tool or Swiss Army knife
  • Portable phone chargers or power banks
  • First-aid kit

Personal care items

  • Medications (prescriptions and over-the-counter)
  • Hygienic supplies (toothbrush, toothpaste, wet wipes, etc.)
  • Spare glasses or contact lenses
  • Masks to protect from dust, especially in wildfires

Important documents

Store critical documents in a waterproof, portable container. Include:

  • Personal identification (e.g., driver’s licenses, passports)
  • Insurance policies and property deeds
  • Medical records
  • Emergency contact list

Extras for families and pets

Got pets or small children? Add:

  • Baby food or formula and diapers
  • Pet food and a leash
  • Comfort items like toys or blankets

Store your kit in an easy-to-access location and review its contents every six months to replace expired items.

Step 3: Make a Family Emergency Plan

When disaster strikes, every second matters. That’s why a clear emergency plan is critical. Follow these steps to ensure everyone in your household knows what to do:

Establish communication

  • Identify an emergency contact: Choose someone outside your immediate area who can act as a central point of contact for your family.
  • Create a group text thread: Use it to share updates and confirm everyone is safe.

Determine evacuation routes

  • Familiarize yourself with local evacuation routes and shelters.
  • Practice these routes with your family, including backup options in case the primary path becomes inaccessible.

Decide on a safe meeting spot

Choose two meeting locations:

  • One near your home in case of sudden events like a fire.
  • Another outside your neighborhood in case of a major evacuation.

Know how to shut off utilities

Fires and floods can cause electrical and gas hazards. Teach every capable household member how to shut off the following:

  • Water: Locate your main valve.
  • Electricity: Find your circuit board.
  • Gas: Learn how to properly turn off your gas line (and only turn it back on with the assistance of a professional).

Step 4: Strengthen Your Home Against Disaster

Your home can be your shelter—if it’s properly fortified. These steps can reduce potential damage:

Protect against floods

  • Elevate electrical outlets, appliances, and wiring above flood level.
  • Install sump pumps and consider adding flood vents.

Prepare for storms and winds

  • Install storm shutters on windows or keep plywood ready.
  • Secure heavy furniture, like bookcases, to the wall to prevent tipping.

Fireproof your property

  • Remove dry vegetation and brush at least 30 feet from your property.
  • Install fire-resistant roofing materials like asphalt shingles or metal.

Earthquake-proof your home

  • Use straps to secure heavy furniture and appliances.
  • Brace your chimney and water heater.

Step 5: Stay Alert and Stay Safe

Finally, ensure you’re equipped to stay informed and make quick decisions during a disaster.

Sign up for emergency alerts

  • Sign up for alerts from services like FEMA, the Red Cross, or your local government. Many will send text or email updates directly to your phone.

Use reliable information sources

Stick to trusted sources like:

  • NOAA Weather Radio
  • National Weather Service (NWS)
  • CDC and FEMA websites

Know when to evacuate

Pay attention to evacuation orders and warnings. If local authorities recommend leaving, don’t wait—evacuate immediately.

Keep cash on hand

ATMs and credit card systems often go offline during disasters. Having a supply of small bills can help you purchase necessities.

What to Do After the Disaster

Your work doesn’t end when the disaster passes. Here’s how to assess and recover:

  • Check yourself and loved ones for injuries.
  • Inspect your home for damage before re-entering.
  • Document any damage with photos for your insurance claim.
  • Reach out for assistance from local relief organizations.

Make Preparedness a Priority

Preparing for a natural disaster can feel overwhelming, but remember, every step you take now can save lives and property later. From building a disaster kit to creating an emergency plan, you have the tools to protect yourself and your loved ones.

Start small—review your home for vulnerabilities or put together your kit this weekend. The vital steps you take today will equip you to face tomorrow’s challenges with confidence.

Products:

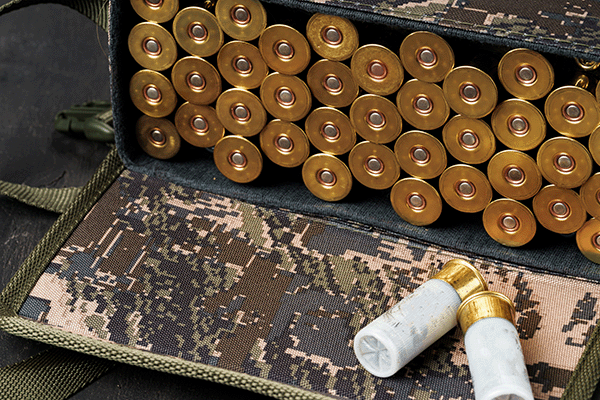
12 Gauge Dragon’s Breath Shot Gun Ammunition

Videos:

Our YouTube Channel

Posted on

How to Prepare a 72-Hour Kit (Bug Out Bag) for Emergencies

bug out bag

Natural disasters, power outages, or unexpected emergencies can strike without warning. While we can’t always predict when these events will occur, we can prepare for them. A well-equipped 72-hour kit, often called a “bug out bag,” could be the difference between chaos and peace of mind during an emergency.

Whether you’re a seasoned prepper or just beginning to explore emergency preparedness, this guide will walk you through the essentials of creating a 72-hour kit that will keep you safe, comfortable, and ready for the unexpected.

What is a 72-Hour Kit or Bug Out Bag?

A 72-hour kit is a backpack or bag filled with essential items designed to sustain you for up to three days (72 hours) in an emergency situation. The idea is to have all the basics—food, water, clothing, tools, medical supplies—readily accessible so you can grab the bag and go if necessary.

The “bug out bag” concept originally gained popularity in prepper communities as a response to life-threatening scenarios where quick evacuation is required. However, 72-hour kits are now widely recognized as a practical emergency preparedness tool for everyone.

Why is a 72-Hour Kit Essential?

Emergencies—be they natural disasters, severe storms, or large-scale evacuations—often strike without warning. A 72-hour kit ensures you are equipped with everything you need to survive, stay safe, and manage the waiting period until help arrives or you regain access to regular services.

Key benefits of a 72-hour kit include:

  • Rapid response to evacuation orders.
  • Self-sufficiency when services like power, water, and stores are unavailable.
  • Peace of mind knowing you’re prepared for the unexpected.

Now that we’ve established why you need one, let’s focus on how to build an effective 72-hour kit.

How to Build Your 72-Hour Kit

1. Choose the Right Bag

Your 72-hour kit starts with a durable, comfortable, and spacious bag. Look for these features when selecting your bag:

  • Size: Ensure it’s large enough to hold all your essentials but not so bulky it becomes difficult to carry.
  • Compartments: A bag with multiple compartments helps organize your items for quick access.
  • Comfort: Look for padded shoulder straps, adjustable waist straps, and breathable material, especially if you’ll need to carry it for extended periods.

Great options include sturdy backpacks, tactical bags, or large hiking packs.

2. Water Supply is Critical

Water is one of the most critical components of survival. Include the following for your water needs:

  • Water bottles or hydration bladders (carry at least 1 gallon per day per person).
  • Water purification tablets or a portable water filtration system, such as a LifeStraw.
  • Collapsible water containers for extra storage if resources run low.

3. Pack Sustenance with Emergency Foods

Food should be lightweight, non-perishable, and easy to prepare. Examples include:

  • Energy bars or high-calorie meal bars.
  • Dehydrated or freeze-dried meals (just add hot water!).
  • Canned goods with pull-off lids (don’t forget a lightweight can opener if needed).
  • Trail mix, nuts, and dried fruit for snacks.

Ensure your food can last for at least 72 hours, and don’t forget utensils and a portable stove or heat source if required.

4. Clothing and Shelter

Pack lightweight, weather-appropriate clothing and gear to protect against the elements. Essentials include:

  • Seasonal layers such as thermal underwear and jackets for colder climates.
  • Extra sets of underwear and socks (wet feet can be painful and dangerous!).
  • Waterproof poncho or jacket for rain protection.
  • Emergency blanket or a small sleeping bag for warmth.
  • A compact tent or tarp for temporary shelter.

5. Comprehensive First Aid Kit

Minor injuries can quickly become serious in an emergency. A first aid kit is non-negotiable. Include items such as:

  • Band-aids, gauze, and medical tape.
  • Antiseptic wipes and antibiotic ointment.
  • Pain relievers and any prescription medications you require.
  • Tweezers, scissors, and disposable gloves.
  • CPR mask and emergency medical instructions.

6. Tools and Survival Gear

A few versatile tools go a long way. Here’s what to pack in your kit:

  • Multi-tool or Swiss Army knife for general utility.
  • Flashlight with extra batteries (or a crank/solar-powered flashlight).
  • Fire starters, such as waterproof matches, a lighter, or flint and steel.
  • Paracord for securing shelter, bundling items, or other makeshift uses.
  • Duct tape, which seems to fix almost anything.
  • A whistle to signal for help if needed.

7. Personal Hygiene Supplies

Hygiene is often overlooked in emergency kits but plays a critical role in maintaining health and morale. Pack the following items for basic cleanliness:

  • Travel-sized toiletries like toothpaste, soap, and deodorant.
  • Toilet paper or biodegradable wipes.
  • Hand sanitizer and disposable gloves.
  • Feminine hygiene products, if applicable.

8. Important Documents and Cash

Emergencies can mean banks are closed or ATMs are inaccessible. Keep copies of essential documents in a waterproof bag and include some cash. Examples include:

  • Identification documents (driver’s license, passport).
  • Medical records and prescriptions.
  • Insurance information.
  • Emergency contact numbers (written down—don’t rely solely on your phone).

9. Communication and Navigation Tools

Don’t get caught off guard if cell towers are down. Equip yourself with the following tools for communication and navigation:

  • Battery-powered radio or hand-crank radio to stay updated with emergency broadcasts.
  • Printed maps of your local area and evacuation routes.
  • Fully charged power bank for cell phone charging.

10. Tailor Your Kit to Your Needs

Every individual or family will have unique needs, so consider personalizing your 72-hour kit by including items such as:

  • Baby formula and diapers for those with infants.
  • Pet supplies if you have furry family members.
  • Entertainment, especially for kids (small toys or books).

Maintaining and Reviewing Your 72-Hour Kit

Your 72-hour kit isn’t something you can build once and forget about. Follow these steps to keep it in top condition:

  • Check expiration dates on food, water, and medications annually, and replace them as necessary.
  • Test your gear, such as flashlights and fire starters, to ensure they remain functional.
  • Update clothing and supplies as seasons change or as your family’s needs evolve.

Stay Prepared and Confident

Having a fully stocked and carefully organized 72-hour kit offers peace of mind and drastically improves your ability to respond to emergencies. Whether you’re evacuating due to a wildfire or facing a power outage after a storm, you can rest assured that you’re ready for whatever comes your way.

If you’re just starting, don’t feel overwhelmed—start small and build your kit over time. Stay prepared, stay safe, and take control of your preparedness today!

Products:

Rope and Cordage may come in handy for your Bug Out Bag. Click here to see our lineup. 

Cutlery and tools. 

12 Gauge Dragon’s Breath Shot Gun Ammunition for signaling

Videos:

Our YouTube Channel

Posted on

How Much Ammo Should I Have? A Comprehensive Guide for Gun Enthusiasts 

Amount of Ammo

How Much Ammo Should I Have? – Understanding the right amount of ammunition to have on hand is a question at the forefront of the minds of many who own or use firearms. Whether for sport, self-defense, or emergency scenarios, the quantity of ammo you should possess is a critical consideration. This guide aims to provide you with a strategic approach to determining your ammunition needs, practical tips on building and maintaining a stockpile, and tailored advice for specific types of firearm users. 

The Foundations of Ammo Quantity Assessment 

Your ammunition quantity is not a one-size-fits-all statistic. It hinges on several variables such as the type of firearm, its intended use, personal shooting habits, and storage considerations. When it comes to assessing your ammo needs, one must acknowledge the variety of applications and the unique approach that corresponds with each. 

Sport Shooting Considerations 

Sport shooting encompasses a broad range of activities, each with its own ammunition consumption rates. For casual target shooters, rounds numbering in a few hundreds may suffice for a season. However, competitive shooters involved in events such as IPSC or 3-Gun competitions may require several thousand rounds to effectively practice and compete. 

Self-defense and Personal Security 

Self-defense is a highly personal topic, and the amount of ammunition you need is dictated by various factors, including local crime rates, potential scenarios, and personal training. For a home defense scenario, a few boxes to regularly cycle through your firearms may be appropriate. Individual training and proficiency level will also play a crucial role in determining an adequate self-defense ammunition stash. 

Emergency Preparedness 

In the context of emergency preparedness, the approach to ammunition is often more about possibility than probability. A large volume of ammo may be considered essential, contingent upon the nature of the emergency and the duration one aims to weather. Preppers often assess their needs by the potential length of the emergency, which can range from days to months. 

Stockpile Sizing for Different Enthusiasts 

Tailoring your ammunition quantity to match your enthusiast category is key to optimal preparedness and costs. 

For the Casual Gun Enthusiast 

Casual gun enthusiasts find shooting to be a leisure activity. It is less about quantity and more about quality—enjoying every shot and honing skills. A modest stockpile that allows for recreational shooting and the occasional range trip is sufficient. This may amount to a few boxes of ammunition, typically ranging from 50 to 250 rounds per firearm, based on frequency of use. 

Dedicated Preppers and Survivalists 

For those serious about emergency preparedness, ammunition is often viewed as a critical resource. Their stockpiles, scaling potentially into the thousands, should be diversified across calibers, types, and intended uses. The focus is not only on self-defense but also on hunting, bartering, and even training others. 

Shooting Sports Professionals 

Professional shooters and those engaged in competitive shooting require an extensive supply of ammo to maintain skill levels and endure the many rounds needed for practice and competitions. Thousands of rounds per week are not unusual here, aligning with a schedule that prioritizes frequent, intense practice sessions. 

Understanding and Complying with Laws 

Regardless of one’s enthusiast category, it’s important to stay informed about local and federal regulations regarding ammunition. Laws may impose limits on purchase amounts or types of ammo, and storage guidelines must be followed for safety and compliance. 

Ammo as a Commodity: A Prepper’s Perspective 

To the prepper community, ammunition is often considered a valuable commodity in the event of societal collapse or a long-term emergency. Beyond personal use, it can be a tradable item for goods or services. The focus is on long-term storage, and certain ammunition types are more coveted and practical for such conditions. 

Ideal Ammo Types for Long-Term Storage 

When stockpiling for long-term storage, selecting ammunition types known for their stable components and shelf life is essential. Common choices for longevity include .22LR, 9mm, 12-gauge, and .223 Rem., amongst others. It is advised to keep ammunition in a cool, dry environment away from direct sunlight and extreme temperatures to preserve integrity. 

Budgeting and Acquiring Ammo Over Time 

Building a significant ammo stockpile can be costly, which is why budgeting is crucial. Allocating a specific portion of your shooting budget towards ammo purchases and taking advantage of bulk deals or discounts are helpful strategies. Patience and consistency in procurement are key, lest you overspend or purchase more than you can safely store. 

Managing and Rotating Your Stock 

Ammo is not immune to expiration, particularly in suboptimal storage conditions. Regularly checking your ammo stock, rotating out older rounds for newer ones, and ensuring proper storage practices are critical. This not only maintains the effectiveness of your ammunition but also ensures safety in handling and shooting. 

Responsible Ammo Ownership and Usage 

More than just a metric of preparedness, the quantity of ammunition you own reflects your responsibility as a gun owner. It is a privilege that entails safe storage and handling practices. Engage in continuous education, adhere to local laws, and advocate for gun safety within the broader community. 

Determining the Right Amount for You 

The “right” amount of ammo is relative and subject to change based on personal circumstances. Regular reassessment is necessary to align your stockpile with your evolving shooting habits and preparedness outlook. This responsible approach ensures a supply that is both adequate and manageable. 

Encouraging Ongoing Learning and Reflection 

The gun enthusiast community is one that values knowledge and experience. Continue learning about best practices, new training methods, and the laws that govern ammunition ownership. Share your experiences and expertise with others to enrich the collective understanding of this critical topic. 

The question of how much ammo one should have is one of nuanced considerations and personal priorities. By thoughtfully examining your shooting habits, intended use, and the underlying philosophy of preparedness, you can arrive at a well-informed answer. The overarching goal is to strike a balance between preparedness, practicality, and responsible ownership. 

Share your insights on ammunition quantities in the comments below and join the conversation on this vital aspect of gun ownership. Your voice and experiences can provide invaluable guidance to fellow enthusiasts as we all strive to safeguard our interests and the wider gun community. 

Beyond the numbers and quantities, remember that ammunition represents a commitment to safety, skill, and, if need be, survival. By approaching this topic with care and foresight, you not only enhance your own readiness but contribute to a more informed, responsible, and secure gun culture. 

Check out our complete line of products here 

Products:  

12 Gauge Dragon’s Breath Shot Gun Ammunition 

Videos:  
Our YouTube Channel